Pages

Wednesday, June 30, 2010

Chocolate (Nutella) Lassi

Its too hot here and we guys are really suffering to this sudden extremely hot sunny days..Am just running behind salads and lassis, after making out many spicy version of lassis i planned to make out a simple, quick and sweet lassi with simple ingredients especially with chocolate and nutella spread, we guys fond always for chocolate and anything with chocolate, finally i went for few spoons of nutella spread and a melted chocolate bar to prepare this delicious, fantastic drink along with yogurt, sweetened condensed milk and served chilled or  with ice cubes..Easy breezy drink get ready within few seconds and we enjoyed each and every sip of this chilled chocolate lassi..Best and fabulous lassi to beat the heat, definitely a excellent feast for chocholic person like me..

Chocolate Lassi

2tbsp Nutella spread
100grms Chocolate bar(I used lindt milk chocolate)
2cups Yogurt
2tbsp Sweetened Condensed Milk
1cup Cold Milk

Melt the chocolate bar in microwave oven for 2 minutes with water, blend the nutella spread, melted chocolate, yogurt, sweetened condensed milk, cold milk..Serve chilled or with ice cubes...

Chilli Tofu-T&T From Dil Se..

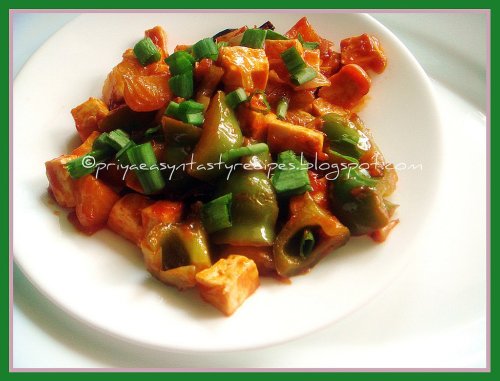
Needless to say about the health benefits of tofu, the famous soya cheese..Its quite a routine for me to get tofu packets whenever i go to nearby Chinese store, this time i was planning to make out something spicy at the same time as a side dish to enjoy along with rice..While going through Divya's space, i got hooked with this chilli tofu which sounds prefect for me to make out immediately with the extra firm tofu i bought...Its really very quick and easy to prepare, i prepared quite like a dry chilli tofu, while Divya went for a gravy like dish..Everyone at home liked this mildly spicy chilli tofu with rice and for dinner along with rotis..Healthy dish to enjoy even as a appetizier,definitely a feast for vegan lovers..I have added more bellpepper cubes and skipped the green chillies which i replaced with chilli sauce in my chilli tofu apart from that i didnt made any changes and followed exactly as like Divya went for this chilli tofu..

Chilli tofu

1cup Tofu cubes
1no Onion (big & cubed)
1tbsp Ginger garlic paste
3tbsp Tomato ketchup
2tbsp Soya sauce
2tbsp Chilli sauce (can decrease if needed)
2nos Green Bellpepper (cubed)
2tbsp Cornflour
Oil
Few Spring Onions (chopped)

Heat few drop of oil, fry the cubed tofu until they turns golden brown on both sides, keep aside...Heat enough oil in a pan, add the cubed onions and ginger garlic paste, saute until the onions turns transculent and the raw smell goes away, now add the cubed bellpeppers saute for few seconds, keep them crunchy..Add immediately the soya sauce, ketchup,chilli sauce and saute for a minute..finally add the tofu cubes, give a stir..make a thin sauce with cornflour and water, cook until the sauce get thickens..

Garnish with chopped spring onions and enjoy with rice, noodles or rotis..

Tuesday, June 29, 2010

Bean Sprouts Chicken

Usually i used to make out dishes with sprouts either thrice or twice a week, its quite frequent in our menu and i always try to sneak these sprouts everytime as different dishes... Whenever i go to chinese store, i pick usually a packet of fresh bean sprouts and i'll add them often while making noodles or along with simple mixed veggies stir fries...But recently i prepared this bean sprouts chicken dish along with chicken breast chunks with soya sauce and oyster sauce spiced with white pepper powder and chilly flakes..This bean sprouts chicken is quite an easy breezy dish goes fantastic along with sauteed noodles or plain rice..Simple but yet a delicious stir fry to enjoy also very easy dish to get ready with less than 15 minutes...

Sauteed Chicken & Bean sprouts

4nos Chicken breasts (sliced thinly)
2cups Bean sprouts
1/4cup White spring onions(sliced lengthwise
1tsp Chilly flakes
3nos Garlic cloves (crushed)
2tbsp Soya sauce
1tbsp Oyster sauce
2tbsp Cornstarch
1tsp White pepper powder
Sesame oil
Few green spring onions (chopped)

Heat the sesame oil, add the crushed garlic cloves fry until they turns bit crispy, now add the white spring onions,saute for few seconds, add the chicken chunks, chilly flakes with soya sauce, oyster sauce..saute everything for few seconds in high flame until the chicken chunks get cooked..

Add the bean sprouts and saute for few seconds, makes a thin white sauce with cornstarch and water..add immediately to the cooking veggies until the sauce get thickens..finally add the white pepper powder, chopped green spring onions ,give a stir and enjoy along with rice or noodles..


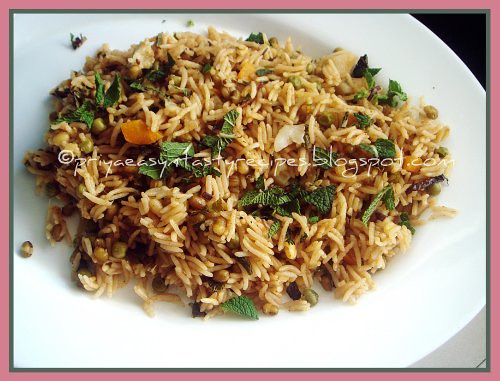
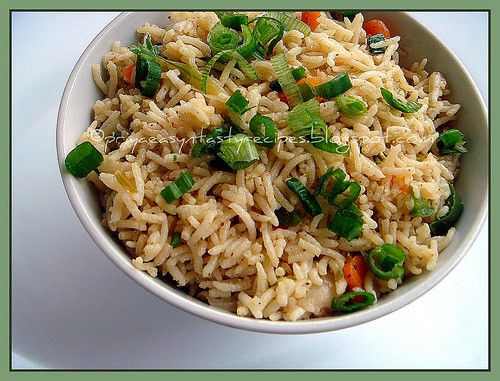
Mixed Veggies & Sprouted Moong Pulao

I love to make simple rice or pulao with sprouted beans, recently i sprouted a packet of green moong beans, with these sprouted moong beans i prepared many dishes and finally some leftover beans were sitting in my fridge and i wanted to finish them quickly as something delicious, quick and easy...Finally i went for this simple pulao with simple ingredients and curd instead of using coconut milk or fresh grated coconut for making a grounded masala to prepare this pulao, u doesnt need anything special to make out this delicious and nutritious pulao as they go for quick preparation..Best way to sneak these protein packed whole moong beans and we enjoyed having with simple onion raita...U can store this beautiful and healthy sprouts pulao in a ziplock bag and freeze them, this pulao will stay intact for more than three weeks and get ready within few minutes if they warmed through microwave oven..

Mixed Veggies & Moong Sprouts Pulao

2cups Basmati rice
2cups Mixed Veggies (carrots, green peas, cauliflowers, french beans)
1cup Sprouted green moongbeans
1no Onion (big & chopped)
2nos Tomatoes (chopped)
2nos Green chillies (slit opened)
1tsp Cumin seed powder
1/2tsp Fennel seed powder
1tsp Coriander powder
1/2tsp Red chilly powder
1/2tsp Pepper powder
1tsp Garam masala powder
1tbsp Ginger garlic paste
2cups Yogurt
2cups Water
Few mint leaves (chopped)
2nos Whole spices (bayleaves, cinnamon stick, cloves, cardamom)
Oil
Salt

Heat enough oil in a pressure cooker,fry the whole spices until they turns brown, meanwhile wash and soak the basmati rice for 5minutes..drain the excess of water, keep aside..now add the chopped onions, chopped tomatoes, ginger garlic paste, slit opened green chillies to the pressure cooker, saute until the onions turns transculent and the raw smell goes away, now add the sprouted moong beans along with salt, cook in simmer with lid closed for few minutes until they turns bit soft, add now the veggies along with pepper powder, cumin seed powder, fennel seed powder, red chilly powder, coriander powder, garam masala powder, saute everything until the veggies get half cooked...meanwhile heat few drops of oil, roast the soaked rice until they get a shiny texture..

Mix the yogurt with water, add them to the cooking veggies...bring everything to boil, add immediately the rice,stir everything, close the pressure cooker with the lid, put the weight..cook in simmer for 10minutes, put off the stove..Once the pressure get released, add the chopped mint leaves, toss gently and serve immediately..

Enjoy with any sort of raita eventhough my choice goes definitely for onion raita..

Monday, June 28, 2010

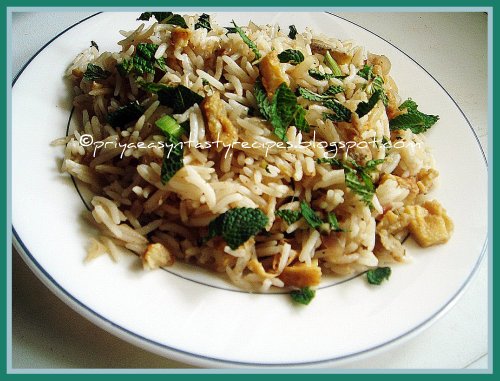
Egg Omelette Masala Rice

My mom used to make egg rice to my sister almost twice a week atleast while she was doing her schooling, she used to go through her school bus, her school is one of the famouse girl's school in Pondicherry and its an obligation for my mom to cook twice a day, yea early morning she makes delicious lunch box dishes for my sister and then later she prepare our lunch, all her lunch box dishes makes me hungry and i wait eagerly to taste some of those leftover dishes...I always fond for one pot meal and i often make my mom's egg rice, this time when i was preparing a birthday party for my daughter i planned to make out some mild spicy dishes as all her classmates doesnt eat that much spicy dishes, immediately my mom's egg rice came to my mind since its goes for just chopped green chillies or either pepper powder, for a change i prepared this rice by preparing a big omelette in a pan and cut them as cubes, finally i added them along with mildly spiced masala rice ..My daughter's friends enjoyed having this rice, a huge bowl of this rice vanished within few minutes...

Egg Omelette RIce

5nos Eggs
2nos Onions(chopped)
2nos Green chillies (chopped)
3cups Cooked rice
1/2tsp Pepper powder
2nos Bay leaves
1tsp Cumin seeds
1/4tsp Cumin seed powder
1tsp Garam masala powder
Salt
Oil
Few sping onions (chopped)
Few mint leaves (chopped)

Beat the eggs with pepper powder and salt, keep aside..make a huge omelette by heating with few drops of oil in a pan,keep aside and cut them as cubes ...Heat few drops of oil, fry the bayleaves, cumin seeds..add immediately the onions,chopped green chillies,saute for few minutes...add now cumin seed powder, garam masala powder and salt..saute until the raw smells goes away, now add the cooked rice and cubed egg pieces..Toss everything gently until everything get well mixed, cook everything in simmer for few minutes, finally add the chopped spring onions, chopped mint leaves , give a stir..

Serve warm without any side dish!!

Barley Orangeade

Barley water is a drink made from cooked barley grain or it can be made with barley flour. If made with grain barley, water is added and boiled then slowly simmered until the grain is very soft then finished in a number of ways. There are recipes that call for the water to be strained after reducing the liquid, after letting the mixture stand for several hours to allow the barley to really soften or strain as soon as the liquid is cooled. Recipes that call for barley flour call for a quick boil or simmer then straining..Lemon, lime and orange are all popular flavorings to add to the cooked barley water. If using a citrus juice, fresh squeezed lemon, lime or orange juice is added after straining and then sweetened. If using citrus zest, the citrus rind white pith removed is added to the mixture as it is being simmered. Spices such as cinnamon or ginger can also be used to flavor barley water. Sugar,maple syrup or honey are generally used as sweeteners.

These sort of flavoured barley water can be served and enjoyed anytime of the year and its most often prepared and drunk during the summer as a refreshing chilled drink, i prepared this simple and healthy barley drink with orange rinds and orange juice and we enjoyed having them, definitely a refreshing drink to enjoy without any guilt.

Barley Orangeade

1/2cup Pearl barley
6cups Water
1tbsp Orange rinds
1no Orange (sliced)
1cup Fresh orange juice
Maple syrup or sugar as per need

Take pearl barley and water in a large sauce pan, bring to the full boil and then reduce the flame to simmer..add the orange rinds to the cooking barley, cover the pan and cook for 45minutes or either u can use a pressure cooker and cook the barley for 3hisses along with water and orange rinds..put off the stove, strain the water..now add the sugar or maple syrup as per ur need and add the sliced orange pieces, cool down the water, finally add the fresh orange juice and serve chilled or with ice cubes...
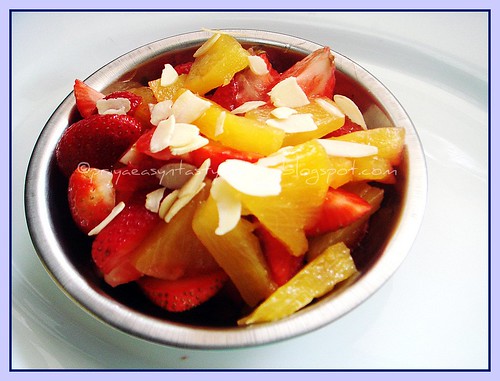
This barley orangeade can be conserved for three to four days in refrigerator, stir well before serving..

Saturday, June 26, 2010

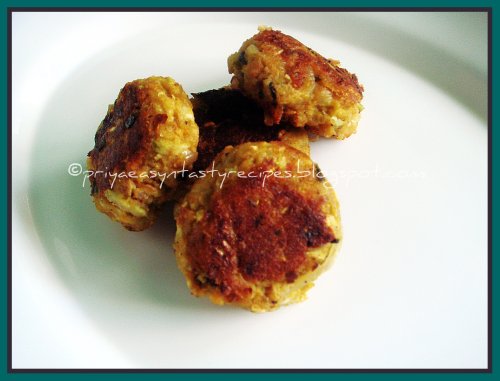
Bottlegourd & Bread Cutlet

Need something for snacks prepared with veggies along with stale bread slices, u should give a look to this yummy cutlet with which i prepared with grated bottlegourd and stale bread slices...This cutlet goes for simple ingredients and quite easy to prepare..Fantastic snacks to enjoy along with ketchup also can be a side dish for simple sambar or rasam rice...With usual ingredients and without eggs, this cutlet tastes yummy, a best way to finish the leftover bread slices instead of making bread crumbs or either trashing them...U can also go for any other grated veggies instead of bottlegourd, am damn sure that whoever doesnt like veggies in their menu, will definitely enjoy having this cutlet..

Bottlegourd & Bread Cutlet

1cup Bottlegroud (grated)
1/4cup Onions (chopped)
4nos Bread slices
2nos Green chillies (chopped)
3/4tsp Garam masala powder
2tbsp Coriander leaves (chopped)
Salt
Oil

Heat few drops of oil, fry the grated bottlegourd until they get slightly cooked, take them in a bowl.. In the same pan,heat again few drops of oil, add the chopped onions and green chillies, saute for few minutes until the onions get transculent, meanwhile soak the breadslices in water,squeeze out the excess of water and keep aside...take the sauteed onions, green chillies, cooked bottlegourd,smashed bread slices along with garam masala powder, chopped coriander leaves, salt..mix everything well...

Make small cutlets out this mixture and shallow fry until they turns brown on both sides, serve hot with ketchup..

Friday, June 25, 2010

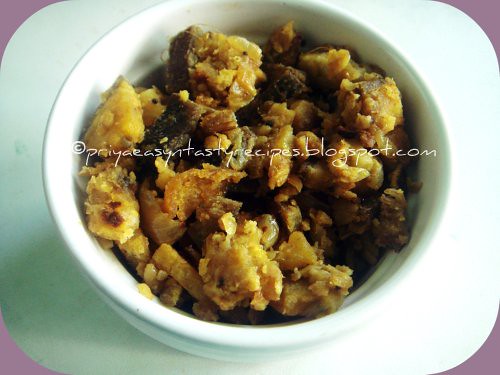
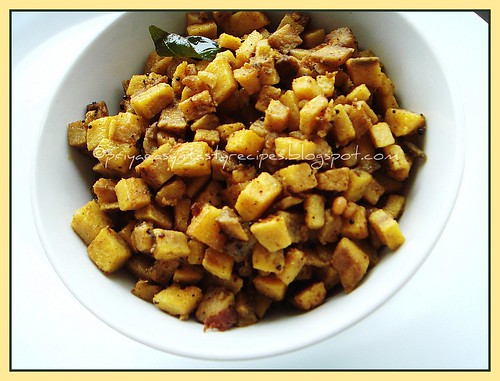
Stuffed Raw Banana Podimas Bread Toast With Oats Crust

I wanted to prepare for our today's lunch something quick, spicy and easy, finally i planned to make out some sandwich with whole wheat bread slices..For filling i dont want to make out any non vegetarian filling and i went for some vegetable filling, while going through my freezer i saw a bag of frozen raw banana chunks which i cooked already with turmeric powder and freezed them before few days..I prepared immediately a simple podimas with those frozen raw banana chunks, finally i used this simple raw banana podimas as filling for sandwich and prepared a simple toast with rolled oats...Its was filling, healthy and delicious bread toast we enjoyed along with simple lettuce salad ,watelse we need.. We had an excellent and filling lunch...

DSC09834


Raw Banana Podimas:
2cups Raw banana chunks (cooked & smashed)
1no Onion (chopped finely)
1tsp Ginger (chopped finely)
2nos Green chillies (chopped)
1/4tsp Turmeric powder
1/2tsp Mustard seeds&urad dal
1/2tsp Channa dal
1no Dry red chillies
Curry leaves
Salt
Oil

Heat enough oil and let splutters the mustard seeds, urad dal, channa dal and dry red chillies, add now the chopped onions, chopped green chillies and chopped ginger, saute everything well until the onions turns transculent, add immediately the turmeric powder, smashed raw banana pieces, salt and curry leaves ,springle some water and  cook everything in simmer for few minutes, until the veggies get well cooked..

Oats Crusted Raw Banana Podimas Stuffed Bread Toast

Oats Crusted Bread Toast:
4slice Whole Wheat Bread
Raw Banana Podimas (per need)
1tbsp All purpose flour
Water
1/4cup Rolled oats
Oil

Spread the raw banana podimas over a bread slice, cover with an another bread slice, meanwhile make a thick paste with all purpose flour and water...brush this thick paste over the podimas stuffed bread slices, springle the rolled oats, press the oats to get well coated over the bread slices, finish the remaining bread slices as the same way..heat enough oil, toast this bread slices on both sides until the toast get well cooked..

Enjoy warm!!

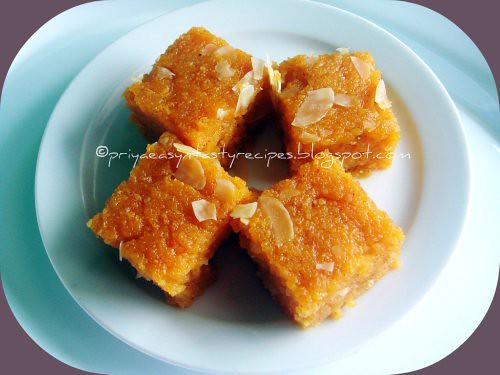
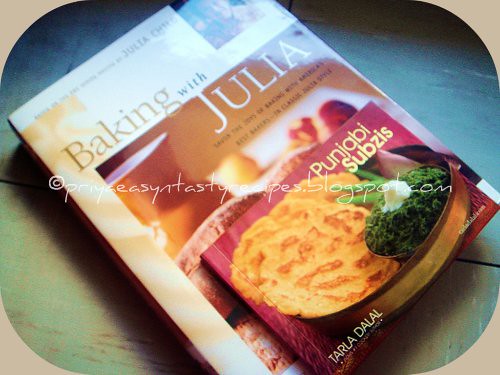
Wheat Flour Halwa & Gifted Cookbooks

Special days never been celebrated without some sweets, i fond always for Karaikal halwa, whenever my dad goes there, he never return back without some wheat halwas, i know making out wheat halwa from the scratch needs loads of patience and a long process, finally i went for an alternative way of making wheat halwa and i choosed atta flour for making out my favourite wheat halwa, it took very less time when compared from the traditional way of making out halwa, i loved this delicious halwa and the whole cooking process take less than an hour and tastewise we guys loved it and enjoyed each and every bite of this halwa...Am very proud to share my new cookbooks which entered to my bookshelf from today onwards..Most of u would have know that am a mega winner of Radhika's Food For Stages Of Life and also she gave me an opportunity to choose the book i wanted to recieve, i went through Amazon.com and i choosed a baking book, for my surprise Radhika send me a beautiful cookbook calling Punjabi Sabzis, thanks a ton Radhika, am very happy to get these two cookbooks from u dear, am very much happy and honoured.

Wheat flour halwa

1cup Atta flour
1/2cup Sugar
2cups Milk
1/4cup Ghee
1/4cup Almond flakes
1tsp Cardamom powder
Orange food colour

Sieve the atta flour, in a heavy bottomed pan, dry roast the atta flour until the aroma comes out, meanwhile heat the milk, sugar and orange food colour,bring everything to boil until the sugar get dissolved, add gradually the hot milk to the roasted wheat flour,stir continously until the wheat flour get cooked, now add the ghee little by little along with cardamom powder, almond flakes..finish the ghee until the wheat flour halwa get off from the bottom of the pan, pour this halwa in a greased plate..let them cool and slice them as u desire..

DSC09817

Am a proud owner of these beautiful cookbooks, thanks again to Radhika for this beautiful books..

Thursday, June 24, 2010

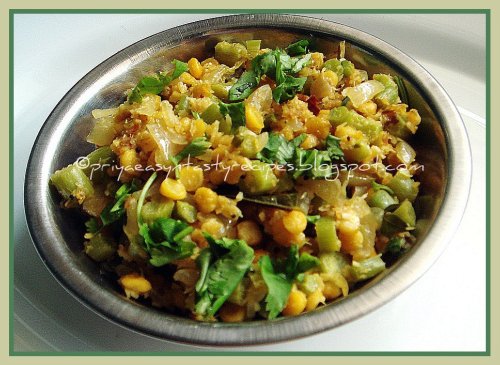
Amaranth Stalks, Oats & Channadal Stir-fry

Usually after making out keerai masiyal, my mom used to make either kootu or simple stir fries with the tender amaranth stalks...Its quite a routine at our home whenever my mom get those amaranth greens, i got a bunch of this amaranth leaves two days back, after making out some masiyal with amaranth leaves, there were some matured amaranth stalks and i dont want to discard them, finally i pressure cooked those mature chopped stalks with channa dal and prepared this delicious stir fry along with oats, quite a simple stir fry which goes awesome along with rasam or curd rice, everyone at home loved this delicious stir fry and now i wont ever discard those matured amaranth stalks anymore coz i can make more beautiful dishes with those stalks with different combos na...Sending to Akila's DNSW- A..

Amaranth Stalks & Channadal Stir fry

2cups Amaranth matured stalks (chopped finely)
1/2cup Channadal (soaked for 15minutes)
1no Onion (chopped)
1/2tsp Coriander powder
1/2tsp Red chilly powder
3tbsp Rolled oats
2tbsp Coriander leaves (chopped)
1tsp Mustard seeds +Urad dal
Oil
Salt

Pressure cook upto 3 hisses both the finely chopped amaranth matured stalks and soaked channadal with enough water.

Heat enough oil, let crack the mustard seeds and urad dal, add immediately the chopped onions and saute until they turns transculent, meanwhile strain the cooked water from the amaranth stalks and channadal and keep aside..

Add the cooked amaranth stalks and channadal to the onions, saute for few minutes, now add the coriander powder, red chilly powder with enough salt, saute for few minutes.

Now add the strained cooked water as per need to the veggies, cook until the veggies get well cooked.

Finally add the rolled oats, toss gently and cook until the veggies get well cooked along with the oats, add the chopped coriander leaves..

Enjoy as side dish..

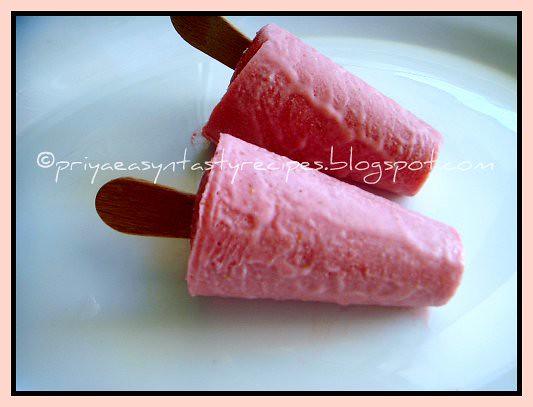
Strawberry & Yogurt Pops

Summer is here, its kinda hot since two days and its seems that hot sun will go for a round during this weekend while the rain darling will visit us..Yesterday while going through my freezer, i got a box full of strawberries i have freezed where sitting and i immediately prepared this simple but yet a guilt free pops using greek yogurts, maple syrup instead of sugar and frozen strawberries,u can also use honey or sugar in case if u dont have maple sryup.. These pops are completely a quick, easy, delicious, refreshing dessert which doesnt need to be cooked..Yes its a no cook pops get ready within few minutes, a fabulous pops to enjoy when its hot outside..We loved it and its quite a simple dessert to prepare easily anytime..

Strawberry pops

2cups Strawberries (chopped finely)
Maple syrup as per need
2cups Greek yogurt
1tbsp Lemon juice

Take the greek yogurt, lemon juice, strawberries, maple sryup in a blender and blend until they turn as a smooth puree, pour this puree in a popsicle moulds, kulfi moulds or plastic cups and arrange them in freeze..When the pops get partially firm, insert a popsicle stick in the middle of these pops and arrange in freezer until they get completely frozen..

Run warm water over the plastic cups or popsicle moulds to remove the pops before serving..

Wednesday, June 23, 2010

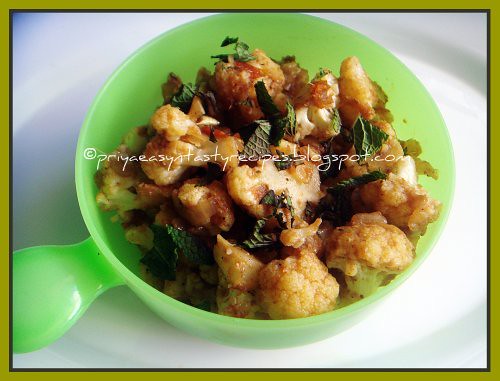
Stuffed Pepper Gobi Masala Bread Toast

I was hosting this month Global kadai and i was bit late to post my entry for this fabulous event..finally am here with a fantastic bread toast i prepared with pepper gobi masala which i finally prepared as toast with peppered beatened egg...This bread toast suits prefectly for lunch with a simple salad while for dinner with a bowl of soup..Its quite a filling toast, tastes awesome and spicy coz of the gobi masala i have prepared with pepper powder and garam masala powder..Its also a quite a simple masala which i usually prepare along with green peas and potatoes,but this time i totally went for gobis as they were sitting in my fridge since for two days.

Pepper gobi masala

Pepper Gobi Masala:
2cups Cauliflower florets
1no Onion (chopped)
1no Tomato (big & chopped)
1tsp Ginger garlic oaste
3/4tsp Pepper powder
1tsp Garam masala powder
Salt
Oil
1/2tsp Fennel seeds
Few mint leaves (chopped)

Heat enough oil, fry the fennel seeds and add immediately the chopped onions, chopped tomatoes, ginger garlic paste with enough salt ,saute until the onions turns transculent and the raw smell of ginger garlic paste get disappears..now add the chopped cauliflower florets, saute for few minutes..finally add the pepper powder, garam masala powder, toss everything gently, put the flame in simmer and cook until the veggies get well cooked,finally add the chopped mint leaves, put off the stove..

Gobi bread toast

4nos Whole wheat bread slices
Pepper Gobi masala (as per need)
1no Egg
2tbsp Milk
Pepper powder (per need)
Salt
Oil

Fill two bread slices with enough pepper gobi masala, cover the masala with the  another two bread slices, meanwhile beat the egg,milk with pepper powder and salt.... heat enough oil in a pan..dip gently the stuffed masala bread slices in the egg mixture and drop immediately to the pan, cook on both sides until they get golden brown..

Serve warm!

Chocolate Fondant Cake With Nutella Cream Frosting

Chocolate, the word itself makes me drool, who will say 'No' to chocolates??? definitely not me that too during special occasions, this weekend was something special for me and i was very much happy to prepare this chocolate fondant cake to celebrate that special day..This fondant cake is one of our family favourite and i do this often for special occasions, eventhough i never ever posted this cake recipe in my space yet, so when i prepared this cake for the special day, i tried to present them with a nutella cream frosting which i tried for the first time at home, i did the frosting very much easily with nutella spread, butter, confectioner's sugar, but the difficult part is to decorate the cake, am not a professional nor took a special baking or cake decorating class till now, its was kinda a hard task for me to decorate a cake, somehow i managed to decorate this chocolate fondant cake, u can also notice that i didnt decorated them prefectly, eventhough everyone at home liked the way i have decorated the cake and enjoyed having them...

Chocolate cake

Chocolate Fondant Cake:
250grs Dark chocolate bar (broken as small pieces)
150grs Butter (room temperature)
4nos Eggs
1/2cup Sugar
1/2cup Self raising flour

Preheat the oven to 350F..Beat the butter and sugar until they turns soft and smooth, meanwhile separate the egg yolks, beat the yellow yolks along with the butter-sugar mixture until they turns pale..In a microwave safe bowl, add the chocolate pieces with few water and melt them for few minutes, add this melted chocolate to the already prepared butter,sugar and egg mixture...Give a stir, now add  the flour, its will be very thick to mix,dont worry, stir them well and keep them aside...Beat the egg whites with a pinch of salt until they turns foamy, beat until the soft peeks form..now fold this beatened whites to the chocolate-flour mixture, little by little until they get well mixed..

Pour this cake batter in a greased round pan, bake for 20-25minutes or until a skewer inserted cames out clean..Keep aside and the cake get cooled completely..

Nutella Cream Frosting:
5tbsp Nutella spread
1cup Butter (softened)
1+1/2cups Confectioner's sugar
1tbsp Milk

Take all the ingredients in a bowl and beat until everything get well mixed...fill this cream in a ziplock bag, make a small hole, press this cream over the already prepared cake, using a spatula spread the frosting over the cake and with the remaining cream,decorate the cake as u desire, i springled few chocolate vermicelli over the cake..Keep them in fridge for two hours and serve them..

Enjoy!!

Tuesday, June 22, 2010

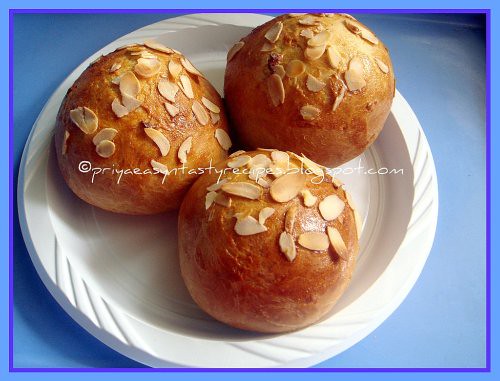
Sweet Almond Buns

I fond always for sweet buns, its has been a long i prepared sweet buns at home, while i was planning to make out some sweet buns at home this time, i wanted to make them with some nuts while going through my pantry i got a bag of almond powder and almond flakes which was sitting since a month, immediatley i gathered all the ingredients to make out these sweet buns with almond powder and almond flakes..This bun is really very simple to prepare, delicious to enjoy..Just dip this sweet buns in a cup of tea and enjoy it either for breakfast or for dinner, they will tastes absolutely divine, also u can serve them with nutella spread or with fruits jams and butter..This buns stays prefect for three to four days in room temperature and for month if they are freezed in  ziplock bags,once they get defrost, just heat in preheated oven or in microwave oven and enjoy as u desire...

Sweet Almond Buns


4cups Bread flour /All purpose flour
1cup Almond powder
1/4tsp Almond extract
2tbsp Active dry yeast
1cup Confectioners sugar +2tbsp Sugar
1/2tsp Salt
1no Egg (beatened)
1/2cup Butter (softened)
1cup Luke warm milk
Almond flakes
Egg yolk+Water (to glaze)
Water as per need

Add the active dry yeast, sugar and salt to the luke warm milk and let this mixture sit for 5 minutes,until the yeast turns foamy..Now add the softened butter, confectioner's sugar,beatened egg,bread flour,almond powder,almond extract and the foamy yeast mixture ,water (if needed) and knead as a soft  and smooth dough, arrange this dough in a greased bowl and keep this bowl in a warm place for an hour with lid closed until the dough doubled their volume..

After an hour, make 10-12 medium sized balls, knead well until the dough turn soft, shape them as buns..Arrange them over a baking sheet lined over a baking tray..let them sit again for an hour or until they doubled their volume...Preheat the oven to 350F..meanwhile brush the buns with egg yolk mixed with water, springle the almond flakes and bake them in middle rack of the oven for 25-30minutes until the crust turns golden brown..

Enjoy warm!!

Chickpeas Fritters - T& T From Dil Se..

My second post which i tried and tasted from Divya's blog is this Garbanzo Fritters, while i was searching something as snacks with chickpeas at her blog,i got this crispy fritters and this fritters are very much similar to the famous chickpeas fritters called falafel, Divya prepared them in Indianized way with our Indian spices and its really very quick, easy, crispy, delicious snacks which get ready in less minutes, tastes marvellous when served along with ketchup or any other spicy chutney for evening snacks..Thanks to Divya for sharing this simple but yet a delicious snacks or appetiziers which can also be a crowd pleaser..U can either use dry chickpeas which can be soaked overnite and pressure cooked or either canned chickpeas to prepare this fritters, i went for the tinned one and its really very easy and quick to prepare this fritters..

Chickpeas fritters

2cups Chickpeas (tinned)
1no Onion (chopped)
2tbsps All purpose flour
1tsp Cumin seeds
1/2tsp Coriander powder
3nos Garlic cloves
2tbsp Coriander leaves
Salt
Oil for deep frying

Drain the tinned chickpeas in a strainer, combine the chopped onions, garlic, salt, coriander powder, cumin powder and blend it as coarse paste, add the flour, coriander leaves, mix everything well, make small balls from this mixture, meanwhile heat the oil for deep frying, drop gently the already prepared balls, fry them on both sides until they turns golden brown..

Enjoy for snacks with ketchup..

Monday, June 21, 2010

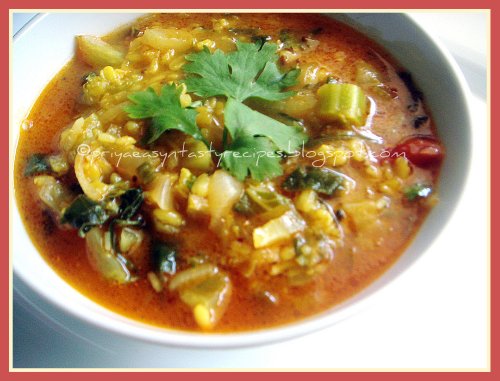
Microwave Cauliflower Leaves Dal

I tried this simple dal with some tender cauliflower leaves, which turned out this dal super delicious and we enjoyed simply with rotis, both together works out wonder and even my H enjoyed this dal with hot rice with papads..This dal goes more than half an hour to get ready in microwave oven and this dal tastes incredibly delicious,with simple ingredients this dal was definitely healthy and tasty..U can try this dal definitely on stove top, but making in microwave oven doesnt need to sit and stir often as we do always when we were cooking over stove top..If u have some works or guests, making out dishes with microwave oven is best and better way to make out foods..

Cauliflower Leaves Dal

3/4cup Moongdal
1cup Cauliflower leaves (chopped finely)
1no Onion (chopped)
1no Tomato (crushed)
2nos Green chillies (slit opened)
1tsp Sambar powder
1tsp Lemon juice
1/4tsp Turmeric powder
1/2tsp Mustard seeds
1/2tsp Cumin seeds
2nos Dry red chillies
1/4tsp Asafoetida powder
Few curry leaves
Oil
Salt

Soak the moongdal with 2cups of water for an hour, cook the moongdal with the soaked water in microwave oven in high for 15minutes with turmeric powder (stir in twice), mash nicely and keep aside..In an another microwave safe bowl, heat enough oil for 1minutes in high, add the mustard seeds, cumin seeds, dry red chillies, asafoetida powder and curry leaves again for 3 minutes in high, now add the chopped onions, crushed tomatoes with salt for 5minutes in high (stir in twice), add the already chopped cauliflower leaves to the cooked veggies and cook for 5 minutes (stir in twice), finally add the cooked and mashed dal to the veggies with sambar powder,salt, slit opened green chillies , cook again for 5minutes..finally add the lemon juice , give a stir...

Serve with rotis or rice..

Avocado Pesarattu

Most of us know very well about this Authentic dish of Andhra, pesarattu are usually prepared with moongdal beans, chillies, ginger and coriander leaves and finally served with upma and ginger chutney, after trying out with many combination, my recent version is this avocado pesarattu, i prepared this avocado pesarattus with sprouted whole green moong beans last week for our dinner, served with spicy coconut chutney, this healthy pesarattu tastes fabulous along with spicy chutney and definitely a nutritious dish to enjoy without any guilt..I have added few avocado chunks while grinding the sprouted moongdal beans,brown rice along with green chillies, coriander leaves, ginger and salt, this pesarattu batter doesnt need to be fermented and u can prepare immediately ur pesarattu, this batter stay prefect for two days in fridge, u can also prepare this batter as kuzhipaniyarams if u r bored to have them as pesarattu..Interesting dish for the sure, none will find out the addition of avocado in this pesarattu also if u have much avocados in ur fruit basket, making out pesarattu is best way to sneak out those avocados..

Avocado Dosa

4cups Sprouted whole moong beans
1no Avocado (peeled & pitted)
1/2cup Brown rice
2nos Green chillies (chopped)
1tbsp Ginger (pieces)
2tbsp Coriander leaves (chopped)
Salt

Soak the brown rice for atleast 3hours..Now grind the sprouted whole moong beans, soaked brown rice, avocado chunks, green chillies, xhopped coriander leaves,ginger and salt as dosa batter with some water..Heat a tawa, pour a ladle full of the batter, gently spread the batter as a small circle, cook in medium heat, drizzle some drops of oil if needed..

Serve warm with some spicy chutney...


Sunday, June 20, 2010

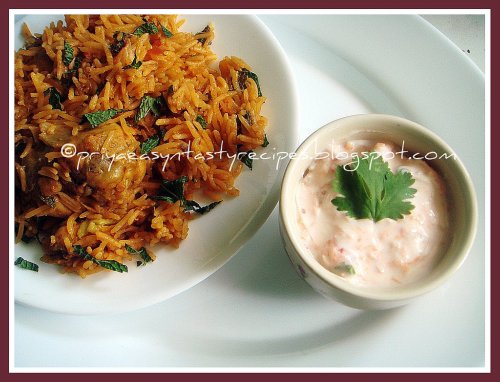
Chicken Briyani & Onion N Carrot Raita

Just few days back, while i was uploading my recipe index, i saw that i didnt post my usual way of making out briyanis with chicken, dunno how i missed our family's favourite, the most favourite sunday special dish...So i prepared today and clicked some pictures, atlast my chicken briyani gonna be posted in my space...Learned this chicken briyani from my mom, whenever i make them at home, everyone will be excited and will wait eagerly to be served..My most favourite dish which is also my dad's favourite, he love to have this briyani with onion raita, boiled eggs and brinjal masala, my mom makes excellent brinjal masala almost every sunday whenever she makes this briyani, we love it...This delicious briyani is quite a feast for non vegetarians especially chicken lovers..Yummyilicious briyani prepared with marinated chicken and cooked with spicy masala paste prepared with shallots, green chillies, whole spices finally with coconut milk..Happy Father's Day to all the father..Voila am dedicating this chicken briyani to my wonderful father who is an inspiration for me and my siblings..

Chicken Briyani & Carrot N Onion Raita

2cups Basmati rice
3cups Coconut milk
1/2kg Chicken (chopped as medium size pieces)
2nos Onions (chopped lengthwise)
3nos Tomatoes (big & chopped finely)
1tsp Ginger-garlic paste
Few pinch Orange food colour
2nos Whole spices (bay leaves, cloves, cinnamon stick, cardamom)
1cup Mint leaves (chopped)
Oil
Salt

For marination:
1cup Yogurt
1/2tsp Red chilly powder
1/2tsp Ginger garlic paste
1/4tsp Turmeric powder
Salt

For masala paste:
15nos Shallots
3nos Green chillies
1tsp Fennel seeds
1tsp Garam masala powder
1tsp Coriander seeds

Marinate the chicken pieces with ginger garlic paste, red chilly powder, turmeric powder, salt and yogurt and let them sit for an hour..meanwhile grind all the ingredients given in the list 'for masala paste' with enough water as thick paste...Soak the rice for 15 minutes, drain the water..fry the rice with a some oil until they get a shiny texture, keep aside..

Heat enough oil in a heavy bottomed vessel, add the ghee and oil, fry the whole spices until brown, now add the chopped onions, chopped tomatoes and ginger garlic paste with salt, saute until the raw smell goes away..now add the grounded masala paste,chopped mint leaves,orange food colour and marinated chicken pieces, saute for few minutes...now add the coconut milk, bring everything to boil...Now add the already prepared rice, cook in medium flame for few minutes and put the flame in simmer,close the vessel with a lid ,cook until the rice gets well cooked..

Onion N Carrot Raita:
1cup Carrot (grated)
1/2cup Onions (sliced thinly)
1cup Yogurt
Salt
Few coriander leaves (chopped)

Take the grated carrots, sliced onions, salt, coriander leaves in a bowl, add the yogurt ,mix everything well and serve along with briyani..


Saturday, June 19, 2010

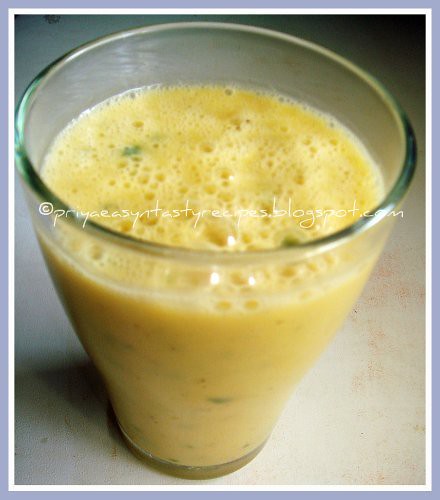
Mint & Mango Peels Lassi

Are you guys used to trash  the mango peels after having some sweet mango flesh??? after seeing this lassi am damn sure that u rnt going to do this anymore, yep i prepared this lassi by using those mango peels which my family doesnt like  and we usually trash those peels whenever we enjoy some sweet mangoes..This time once i peeled those peels , i kept aside for making out some lassis, finally i prepared this delicious lassi with few mint leaves, both together works out wonder and this lassi tastes fabulous, the mild mint flavour doesnt dominate the mango flavour, also i prepared them simply with maple syrup, pepper powder and salt, yes this lassi wasnt either salt version or sweet version, its tastes tremendous... definitely a thirsty quencher which suits  prefectly for hot summer days..
MInt & Mango Peels Lassi

2cups Sweet Mango Peels (chopped)
2cups Yogurt
1/2cup Milk
5nos Mint leaves
Maple syrup
Pepper powder
Salt

Blend the sweet mango peels with milk with pepper powder and salt, strain this blended juice..Blend again this strained juice along with yogurt, maple syrup and mint leaves and serve chilled or with ice cubes..

Enjoy !!!

Friday, June 18, 2010

Avocado Ice Cream

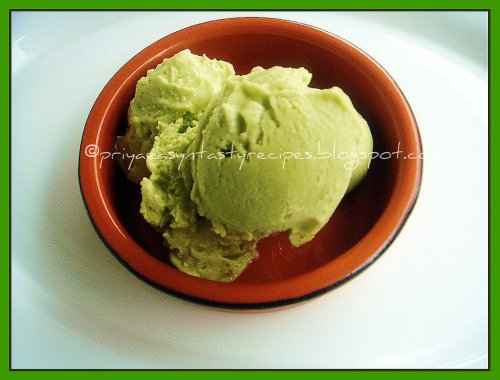
I love avocados much especially love avocados in icecream, i prepared this ice cream with avocado flesh and coconut cream along with fresh cream since a long back and this post was sitting in my draft since a long, avocados with coconut cream and fresh cream turned out this ice cream super delicious, smooth and fabulously yummy, i tried making this fusion icecream without ice cream maker by adding the coconut cream and  fresh cream together and this icecream tastes heavenly, the avocado flesh give a beautiful, lovely and appetizing colour and with the nice aroma of coconut turned them more delicious and irresistible, definitely a beautiful and delicious icecream to enjoy when its hot ..Sending to Akila's Dish Name Starts With A..

Avocado Ice cream

2nos Avocados (peeled and pitted)
1/2cup Sugar
1/2cup Coconut cream (storebought)
1/2cup Fresh cream
1/2cup Milk

Puree the milk, coconut cream, fresh cream, sugar and avocados in a blender until smooth..Pour this pureed avocado in a stainless steel box and freeze them for 3hours, then beat the frozen ice cream with a fork  twice and freeze again for overnite ..next day allow icecream to soften in fridge for few minutes before serving..

Enjoy!

Carrot, Coriander Stalks & Barley Soup

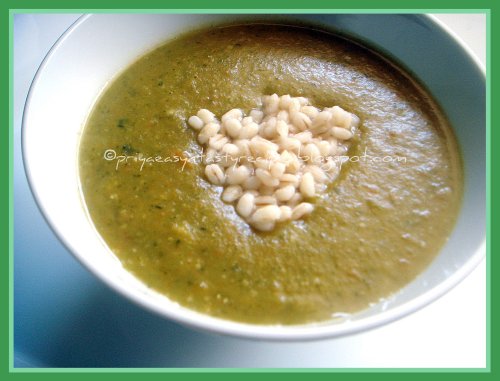
Its bit windy and rainy with loads of climatic changes here, we are almost in summer here, but still the climate is not ready to bring us the bright sun...Yesterday its was rainy and cold here, we guys wanted to have a bowl of comforting soup, my hubby was in front of the TV to watch France-Mexico football match and he doesnt want to come to dinning table to enjoy our dinner, so i wanted to make some soups, so that he can enjoy in front of the TV.. Making soup for dinner is quite a routine for me and this time i wanted to prepare something different, filling, wholesome and also at the same time healthy, finally i prepared this thick soup with carrots chunks, coriander stalks and barleymeal...This soup tastes awesome, with mild coriander flavour and filling soup coz of barleymeal i used for making out the soup instead of potatoes i usually go for the soup...
Carrot, Coriander & Barley Soup

2cups Carrot (cubed)
1cup Coriander stalks(chopped)
1/4cup Barley meal (just ground the whole barley as coarse powder)
1tbsp Olive oil
1no Onion (chopped)
2cups Vegetable stock or water
1/4cup Cooked whole barley
Salt
Pepper powder

Heat the olive oil in a pressure cooker, add immediately the chopped onions, saute until the onions turns transculent, now add the cubed carrots, saute for few minutes..add the chopped coriander stalks, barley meal, give a stir, add the vegetable stock, salt and pepper powder, close the pressure cooker and cook upto three whistles..Once the pressure get released, blend the cooked veggies with a hand blender..

Serve warm topped with cooked whole barley..enjoy!


Thursday, June 17, 2010

Baya Kyaw/Burmese Yellow Split Pea Fritters

Yellow split peas fritters, a crispy snacks tastes awesome with chilli sauce which ressembles quite like our South Indian channadal fritters, but without onions ,ginger and green chillies..this fritters tastes fabulous and prefect for evening snacks, we enjoyed having this fritters with tamarind chutney i prepared for pani puris, they tasted super delicious with this crispy fritters...It seems this fritters are quite an appetizier for a party menu or else for an evening snack, this fritters is quite easy to make and one of the popular fritters in Burma..Whoever like deep fried beauties can give a trial to the splendid fritters and tastes fabulously awesome with hot chilly sauce..The stalls selling these fritters are mostly owned by Indians in Myanmar ... The vendor makes a cone out of an old newspaper, throws in a dozen fritters, and the customer walks off happily eating them. These fritters are a delicious crunchy snack or accompaniment to a meal..
Burmese fritters

1cup Yellow split peas or channa dal (soaked overnight)
1no Onion (chopped finely)
1/4cup Coriander leaves (chopped finely)
1no Red chilli (chopped finely)
1/4tsp Paprika
1/4tsp Turmeric powder
Salt
Oil for deepfrying..

Drain the peas and grind half of the yellow split peas as bit coarse paste, while grind the remaining peas as smooth paste by adding a little water, mix the two grounded paste together, add the chopped onions, chilli, coriander leaves, spices and salt..mix everything well..

Heat the oil for deep frying, scoop a teaspoon of the mixture and with an another spoon form a oval shape bite sized batter, gently drop this one by one to the hot oil..Deep fry in batches on medium flame until they turn golden brown..remove the fritters, drain the excess of oil with a paper towel..

Serve hot with chilly sauce or tangy tamarind dip..

Cold Zucchini & Tomato Salad

I have never tried salads with zucchini, the low caloric veggie which is quite versatile and u can make any sort of dishes with this green veggie, i wanted to make out some salads with zucchini and finally prepared quite an easy salad which we loved having coz this salad goes for simple veggies and it tastes fabulous when served chilled...This time i picked pale green zucchinis which are very much crunchy and dont have that much bitterness presents naturally when compared with dark green zucchinis..Simple, refreshing and a prefect summer salad to enjoy without any guilt and tastes delicious when served along with some grilled meats or seafoods also this salad goes perfectly awesome even if u carry them for picnic...

Zucchini Salad

1cup Zucchini (peeled & grated)
3nos Tomatoes (cut as circles)
4nos Shallots or 1/4cup red onions (chopped)
10nos Mint leaves (finely chopped)
Salt
Pepper powder
Olive oil

Add few pinches of salt to the grated zucchini and let them sit for few minutes in a bowl, drain the excess of water, squeeze out gently the zucchini and take them in a bowl along with tomato pieces, chopped onions, chopped mint leaves, give a stir and arrange in fridge atleast for an hour...meanwhile mix the pepper powder, salt and olive oil together..Add this simple dressing to the salad just before serving and enjoy the salad..Take care not to add the dressing earlier else the salad will turn watery coz of the zucchini..

Wednesday, June 16, 2010

Rosetta Rolls

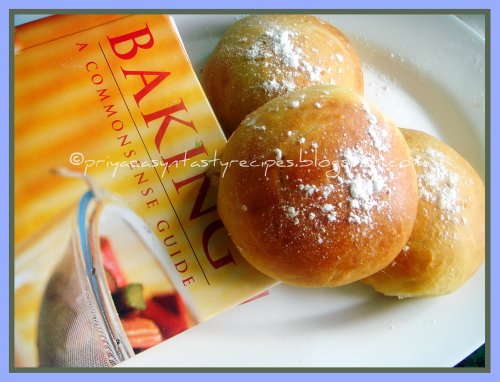
For some reason, i wasnt able to bake breads last few weeks, yesterday i got to bake something as everyone at home started asking when i gonna bake breads..So without any hesitation, i started searching through my baking cookbook and i got hooked with this rosetta rolls..While going through google, i wasnt able to get the origin of this rosetta rolls, anyhow i was happy to try out this beautiful and spongy rolls and we guys enjoyed a lot with nutella spread and strawberry jam with butter, i prepared 12 rolls and they vanished for few minutes and everyone enjoyed having this rosetta rolls for snacks with hot chocolate, both together tastes divine even my hubby asked me make more rosetta rolls next time as he enjoyed a lot with nutella..

Rosettas

5cups White bread flour or All purpose flour
50g Butter (room temperature)
1/4cup Olive oil
1/4cup Sugar
2tbsp Dry active yeast
1tsp Sugar
1tsp Salt
Milk (to glaze)
All purpose flour (to dust)
1/2cup Luke warm water

Mix the yeast, salt and sugar in luke warm water, stir well and leave in warm place for few minutes until the yeast turns foamy..Keep aside quarter cup of the bread flour and put the rest in a bowl, make a small well in the middle of the flour, pour the yeast mixture, butter oil, sugar and add a cup of warm water, stir it with wooden spoon until the dough turns sticky ball, knead the sticky dough over a floured surface, add the remaining flour to the sticky dough and knead for few minutes, until the dough turn smooth and elastic...Grease the bowl and arrange the dough , cover the dough with a damp cloth and let it sit in warm place for an hour..

After an hour, punch the dough and knead the dough again..make 10-12balls from the dough..place the balls in a greased baking tray, using a round cutter press a deep indent in the centre of each balls (but mine got disappeared once i left them to sit for an hour again)..let them sit for an hour or doubled their size..Preheat the oven to 350F, meanwhile brush the rolls with milk and sift a thin layer of flour over them..Bake for 25-30minutes or until golden..Cool completely and enjoy with jam or nutella spread...

Soya & Butter Beans Pulao With Coriander & Mint Stalks

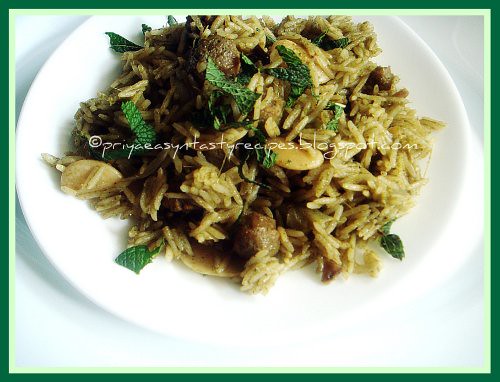
Summer vacation is approaching really faster, we will be leaving for few days to South France to enjoy the hot sun,am so happy that i'll be leaving soon for 15days of relax, no cooking and washing etc during those days..We guys are very much excited and i terribly need some vacation....I saw recently at Kiran's Mint & Cilantro Stalks Pulao, i got hooked to this beautiful dish, where she used the mint and coriander stalks instead of their leaves, truly unique na..Sometimes i wont throw the coriander leaves and i used make dals or i'll add while grinding masala for kurmas, but never used mint stalks while cooking, i really want to give a try to her pulao with stalks..Instead of making just simply with rice and grounded masala with stalks, i cooked few soya chunks and used some butter beans to give more taste to my pulao, thanks to Kiran for sharing this beautiful pulao, we guys enjoyed a lot with raita for our sterday lunch..

Soya & Butter Beans Pulao

2cups Basmati rice
3cups Coconut milk
1no Onion (big & chopped)
1cup Soya chunks
1cup Butter beans (soaked &pressure cooked)
1no Whole spices (bay leaves, cloves, cinnamon stick& cardamom)
Oil
Salt

To Grind:
1/2cup Mint stalks (chopped)
1/4cup Coriander stalks (chopped)
1no Green chillies
2nos Dry red chillies
5nos Garlic cloves
1inch Ginger pieces (chopped)
2tbsp Coconut
1/2tsp Garam masala powder
5nos Peppercorns

Grind all the ingredients together as fine paste given in the list 'To grind', cook the soya chunks with enough water and salt, once they doubled their volume, drain the excess of water and keep aside..Soak the rice and fry it in a pan with few drops of oil, until they get a shiny texture, keep aside...Meanwhile heat enough oil in a pressure cooker, fry the whole spices, add immediately the chopped onions and saute until the onions turns trasnculent, now add the already cooked soya chunks,butter beans and saute for few seconds, immediately add the grounded paste and cook everything in simmer until the oil gets separates..

Now add the coconut milk and bring to boil..add the rice and salt, cook everything in pressure cooker with lid closed, cook in simmer for few minutes until the rice get cooked...put off the stove..Serve immediately with any sort of raitas..

Tuesday, June 15, 2010

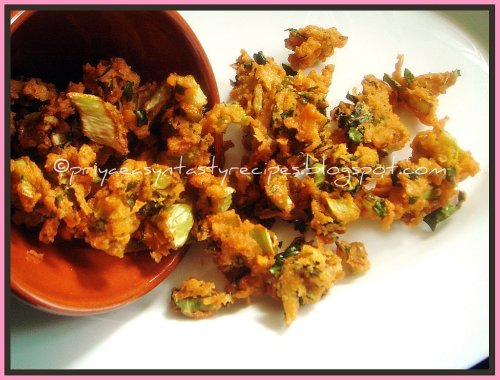
Cauliflower Leaves Pakoda

When its rainy or cold outside, we loved to have some deep fried fritters with a cup of hot tea for our snacks, we had a rainy weekend here, so myself and my hubby were searching something as deep fried fritters for our snacks.. Saturday i picked two cauliflowers with their young leaves,back home i cleaned those leaves and arranged them in fridge thinking to make out something instead of throwing them..I can definitely say that certain events pull us to think more than our creativity and Nithu's recent event was one among those event which brings out our capacity of creating new dishes beyond the usual..Coming to these pakodas, i finally decided to make out  pakodas with those tender cauliflower leaves with besan flour and rice flour without onions, these leaves pakodas turned out prefectly and we enjoyed having this crispies for our snacks with a cup of hot tea...

Cauliflower Leaves Pakodas

2cups Cauliflower leaves (chopped)
1cup Rice flour
3/4cup Gram flour
1tbsp Fennel seeds (crushed)
1/2tsp Baking soda
1tsp Garam masala powder
1tsp Ginger (crushed)
4nos Garlic cloves (crushed)
Salt
Oil for deep frying

In a mixing bowl, add the chopped cauliflower leaves, crushed fennel seeds, baking soda, garam masala powder, crushed ginger, crushed garlic cloves, rice flour and gram flour with salt, springle some water and turn them as stiff batter( take care not to add more water, else the pakodas will turn soggy)..

Heat the oil for deep frying, take enough pakoda batter, springle them to the hot oil, fry them in small batches until they turn golden brown, drain the excess of oil with a paper towel..

Enjoy hot with a cup of tea..

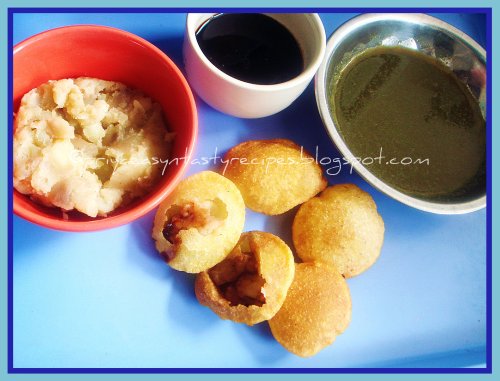
Pani Puri/Gol Gappe~~ICC

Pani puris, i cant forget these tiny puris with potato/peas filling served with tamarind chutney and spicy water, had them long back when i was doing my college in India, my most favourite street food i never ever say 'NO'..Our this month Indian Cooking Challenge was this pani puri and i was very excited to try out these delicious street food at home, that too making out pani puris from the scratch, i always have a thought to make them from the scratch, its was realized through ICC..I never prepared these cute and tiny puris at home coz my better half never knew these chaat foods as he was brought up with chocolates and pastas..I never choosed and asked my hubby to have these street foods whenever we go to India or here in Indian restaurants, i know he will definitely say no and i dont want to compel him...Its quite a great opportunity for me to prepare and having this pani puris at home, also i can ask my hubby to taste and see..To be honest, for my surprise he enjoyed a lot and even before taking some clicks almost all the puris i have prepared vanished with potato filling along with tamarind chutney and spicy water, everyone at home enjoyed it a lot..While making out these tiny puris, i have to change the ingredients given by Srivalli for the puris, coz the baking soda she mentioned for making puris didnt turned them prefectly, so i went for semolina , maida,oil and salt with baking powder, this proportion for puri turned them out puffy and crispy else i followed exactly the same way as the recipe given by Srivalli..

Pani puri

For Puris:
1/2cup Semolina
3tbsp Maida
1/2tsp Baking powder
Salt
1tbsp Oil
Oil for deep frying

In a bowl, mix the semolina, maida, salt and oil, springle some water and knead well to make a stiff dough, let it sit for 15 minutes, then make 3 balls from the dough and roll them as large circles..with a cutter , cut as small circles and cover this tiny puris with a damp cloth, continue the process until the dough get finished..

Now heat the oil for deep frying and fry the already prepared tiny puris, slightly pressing with a slotted spoon, until they get puff and turns golden brown..drain the excess of oil in a paper towel..

Potato Filling:
5nos Potatoes
1/2tsp Red chilly powder
Salt

Pressure cook the potatoes for three whistles, once the pressure get released, take off the potatoes, peel the skin and mash them nicely with red chilly powder and salt and keep aside..

Spicy Water:
1cup Mint leaves
Few corinader leaves
1no Tamarind (blueberry size)
1tsp Ginger
3nos Green chillies
1tsp Roasted cumin powder
1tsp Black salt
Salt

Grind everything in a blender as fine paste, add enough water and arrange this spicy water in fridge to serve chilled..

Red Tamarind Chutney:
1cup Tamarind juice
1/2cup Jaggery
2tbsp Sugar
1/2tsp Red chilli powder
1/4tsp Pepper powder
2cups Warm water
1tsp Cumin seeds
2nos Cloves

Dry roast the cumin seeds and cloves together and ground them as fine powder..add the jaggery, sugar, red chilly powder, pepper powder, roasted cumin-cloves powder and salt to the tamarind juice, heat this mixture in a pan and heat again for few minutes in simmer, put off the stove and let them get cooled..This chutney tends to turn thick once its get cooled..blend this mixture until a smooth paste, red tamarind chutney is ready..My tamarind chutney went bit dark coz of the tamarind i used for, else tastewise its was fabulous..

How to serve Panipuris:
Poke a small hole in the center of the puris,add a teaspoon of the mashed potato filling in the hole,top this smashed potatoes with little red tamarind chutney, dip this stuffed puris in the spicy water and gulp it..

Monday, June 14, 2010

Microwave Capsicum Dal

Needless to say that dals comes first in my comforting foods, i can have anything as dals even daily in my menu, love it that much..This time i prepared dal with green bellpeppers in microwave oven and this dal goes awesome with rice or with rotis, even it takes a bit long to get cook in microwave oven this dal was quite easy to get prepare and tastes super delicious..I prepared this dal with garam masala powder, freshly grounded pepper powder instead of sambar powder.Just enjoy this capsicum dal with hot steaming rice and papads, nothing will beat this delicious combo..Both together tastes absolutely divine and we loved it..

Capsicum dal

1/4cup Masoor dal
1/4cup Moong dal
1no Onion (chopped)
1no Tomato (crushed)
1cup Green capsicum (cubed)
1tsp Pepper powder
1/2tsp Garam masala powder
1tsp Lemon juice
1tbsp Coriander leaves (chopped)
1/2tsp Mustard seeds+cumin seeds
2nos Dry red chillies
Salt
Oil

Wash and soak both dals together in 2cups of  water for an hour..Cook the dals with the soaked water in a large microwave safe bowl in microwave oven high for 15minutes until they get cooked (stir twice),mash well the cooked dal,add water if needed..In an another bowl, heat the oil with mustard seeds, cumin seeds and dry red chillies for 5minutes in microwave oven in high,now add the chopped onions, crushed tomatoes, cubed capsicums and cook again for 10minutes in high until the veggies get well cooked (stir in between)..now add the already cooked dal to the veggies along with pepper powder and garam masala powder..cook again in microwave oven for 3minutes in high..finally add the lemon juice,chopped coriander leaves and give a stir..

Serve hot with rice..

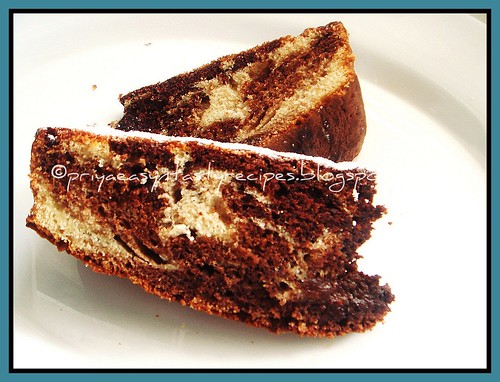
Low Fat Marble Cake

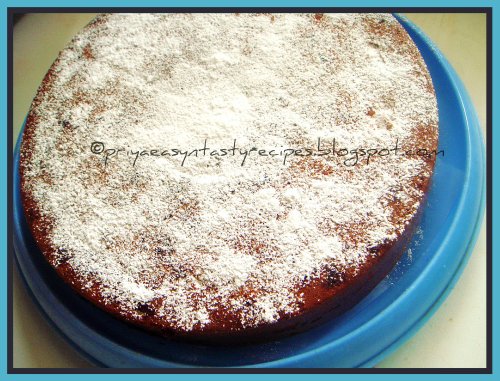
Marble cake is a sponge cake prepared with two batters prepared with vanilla flavoured batter and the another one is with chocolate batter,marble cake wasnt that much complicated, its quite very easy to prepare with a white batter, and this batter is divided in two bowls in which melted chocolate is added to one half..Its very simple to make swirls with the white and chocolate batters by pouring alternatively and then with a knife just make swirls through the two batter to blur the lines...I prepared this cake with thick yogurt and canola oil instead of using batter, this cake is quite a guilt free cake prepared simply with yogurt and oil..Finally i served this marble cake with powdered sugar and we enjoyed this spongy cake for our snacks..

Marble Cake

2cups All purpose flour
1cup Corn flour
2cups Sugar
4nos Eggs
1cup Yogurt
1cup Canola oil
1tsp Vanilla extract
150grms Dark chocolate bar
1tsp Baking powder
1/4tsp Baking soda

Mix together the all purpose flour,corn flour, baking powder and baking soda and keep aside..Beat together the eggs and sugar until it turns pale and smooth, now add the yogurt and oil ,beat everything again for a while..now add the flours , stir everything well and dont overmix..Meanwhile melt the chocolate bar with few water in microwave oven for 4minutes, divide the already prepared batter in two bowls, to the one bowl add the vanilla extract and mix it while in another bowl add the melted chocolate and mix it..Preheat the oven to 350F..

Marble Cake

Greased a round pan or loaf pan, pour the vanilla flavoured batter first, then pour the chocolate batter, with a knife make some swirls through the batter to marbleize it..Bake for 25-30minutes in middle rack or until a toothpick inserted in the centre comes out clean..keep aside and let them cool, springle some powdered sugar over the cake before serving..

Serve warm or at room temperature..

Sunday, June 13, 2010

Double/Butter Beans Curry

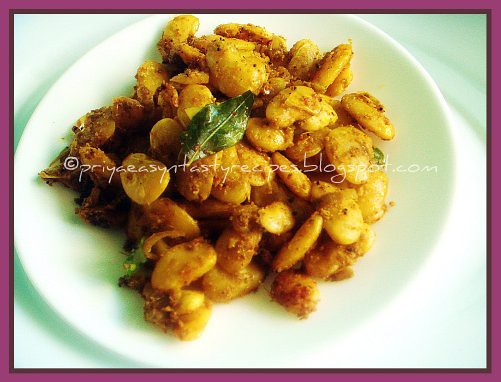
Usually i soak a huge quantity of variety beans and freeze them in zip lock bags, which is quite handy while making out dishes with beans.. I have soaked and freezed a bag of butter beans long back, may be a month ago..After making out kurmas and pulaos with those frozen beans, there were some leftover beans which i dont want to make out again gravies and went through searching by browsing for a different dish, then only i remembered that i have bookmarked long back double beans curry at Rak's space, immediately i went through that simple but delicious curry and prepared them immediately by pressure cooking those frozen butter beans..This curry is very simple, quick and prefect side dish for simple rasam or sambar, i enjoyed having them just like sundal..Thanks to Raji for sharing this delicious and elegant curry..

Butter beans curry

1cup Butter beans (soaked & pressure cooked)
1no Onion (chopped)
2pinch Turmeric powder
1/2tsp Mustard seeds
1/2tsp Urad dal
Few curry leaves
Salt
Oil

To Grind:
1tbsp Coriander seeds
3tbsp Grated coconut
4nos Red chillies
2nos Garlic cloves
1tsp Peppercorns
1tsp Cumin seeds

Grind all the ingredients given under 'to grind' as fine powder, heat enough oil in a kadai, add the mustard seeds, urad dal and curry leaves, fry until they turn brown, add immediately the chopped onions, saute until the onions turns transculent..Now add the cooked beans, salt and turmeric, saute everything in simmer for few minutes, finally add the grounded masala powder, springle some water and cook everything in simmer, until the water gets completely disappears..cook until the masalas turns golden brown..

Serve as side dish..

Saturday, June 12, 2010

Paneer Tawa Masala

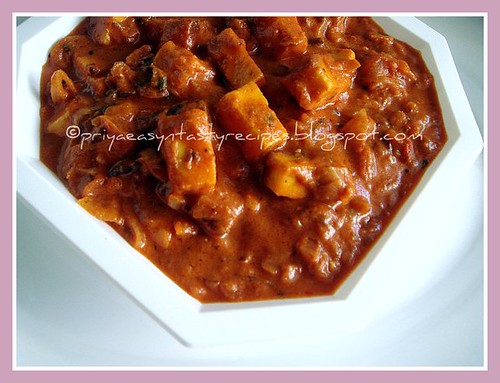
Sometimes we completely forget certain spices since a long in our pantry, which we usually dont even think about those leftover spice powders while cooking, whenever i plan to go to Indian groceries, i'll go through my pantry to check wat i should pick while shopping, this time when i went through my pantry and my freezer, i found a bottle full of kasuri methi, ajwain seeds and few frozen paneer chunks..While browsing, i saw this beautiful paneer tawa masala at Jeyashri's blog, immediately the colour and simplicity of this dish attracted me a lot and i tried this paneer tawa masala for our dinner to serve along with rotis..Wat a delicious masala this dish is, u know even my H who doesnt like that much these sort of masala enjoyed having twice with his rotis, i followed exactly the same process as Jeyashri went for and we loved this delicious masala, thanks to Jeyashri for sharing this fabulous paneer dish..Sending to Jay's Letz Relishh-Paneer.

Paneer Tawa Masala

2cups Paneer (cubed)
1tbsp Kasturi methi
1/4tsp Turmeric powder
1tsp Chilli powder
1/2tbsp Chaat masala
1/2tsp Cumin seeds + Ajwain seeds
2nos Onions (chopped)
2nos Garlic cloves (crushed)
1/2tsp Coriander powder
3/4cup Tomato puree (prepared with 5 ripen tomatoes)
3tbsp Fresh cream
1/2tsp Garam masala
Oil
Coriander leaves (chopped)

Marinate the cubed paneer with chilli powder, chaat masala, salt and turmeric powder with few drops of oil (i added few drops of oil, thats the way the paneer get well coated with the spices)..keep them aside half an hour...

Heat few tsp of oil and fry the marinated paneer cubes until they turns brown on both side, keep aside..Heat enough oil in the same kadai, let splutters the cumin and ajwain seeds, add the crushed garlic cloves followed by chopped onions, saute everything well until the onions turns transculent..now add the coriander, tomato puree and bring everything to boil, cook until the oil get separates from the gravy..Add the already fried paneer cubes and garam masala to the gravy, cook for few minutes, finally add the cream, give a stir..add the chopped coriander leaves and put off the stove..

Enjoy with rotis..

Friday, June 11, 2010

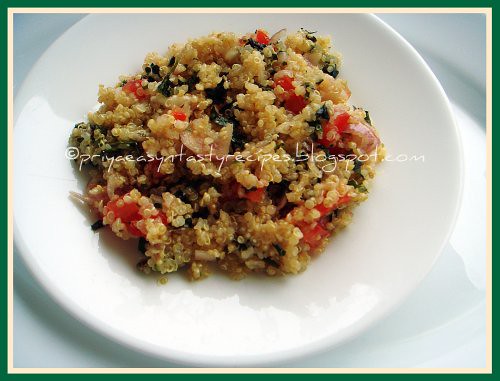
Quinoa Tabbouleh

Tabbouleh is a salad made with fresh veggies, olive oil and spices, it can be eaten in pita bread, scooped onto pita bread, or eaten traditionally with a fork. Tabbouleh can be made with a variety of veggies according to taste. You can add carrots, cucumbers, red or green onions. You can also add romaine lettuce for a fuller salad.Traditionally a mountain dish from the Eastern Mediterranean, and one of the Lebanese main dishes, it has become one of the most popular Middle Eastern salads.Its primary ingredients are finely chopped parsley, bulgur, mint, tomato, spring onion, and other herbs with lemon juice, olive oil and various seasonings, generally including black pepper and sometimes cinnamon and allspice.My version of tabbouleh goes for quinoa with tomato chunks, mint leaves, spring onions served along with finely chopped fresh parsley leaves,lemon juice and olive oil...When served chilled, this salad goes awesome with grilled meats or simply with toasted bread for hot sunny days..

We get hooked to some of our foodie bloggers eventhough we doesnt know them personally, i always admire some of my fellow bloggers for their patience, cooking style and photography.. One among those foodies was Rosie of Baking Cakes Galore who bakes and cooks many beautiful dishes also a co author of Sweet & Simple Bakes who suddenly passed away coz of heart attack in the month of May, still i cant believe that she went far away from us, she was such a beautiful person and its kinda hard for me to write about her..Ivy of Kopiaste..to Greek Hospitality want to bring the awareness about heart problems and wat caused them in memory of Rosie..

What is Coronary Artery Disease??
Coronary artery disease (CAD), also called coronary heart disease, is a condition in which plaque (plak) builds up inside the coronary arteries. These arteries supply your heart muscle with oxygen-rich blood.
Plaque is made up of fat, cholesterol, calcium, and other substances found in the blood. When plaque builds up in the arteries, the condition is called atherosclerosis.

What Causes a Heart Attack?
Most heart attacks occur as a result of coronary artery disease (CAD). CAD is the buildup over time of a material called plaque on the inner walls of the coronary arteries. Eventually, a section of plaque can break open, causing a blood clot to form at the site. A heart attack occurs if the clot becomes large enough to cut off most or all of the blood flow through the artery.

So friends eat well and healthy, also change your way of cooking using less fatty ingredients...

QUinoa tabuleh

1cup Quinoa
2cups Water
3nos Tomatoes (ripen & cubed)
1/4cup Parsley leaves (chopped finely)
1/4cup Red onion (chopped finely)
1/4cup Mint leaves (chopped finely)
1tbsp Olive oil
2tsp Lemon juice
Salt
Pepper powder

Cook the quinoa with 2cups of water until the water get absorbed..keep aside and let them cool...meanwhile take the cubed tomatoes, chopped parsley leaves, onions, mint leaves in a bowl and add the cooled and already cooked quinoa, mix everything together..In a mixing bowl, mix together the olive oil, lemon juice, salt and pepper powder, add this seasoning as per need to the quinoa tabbouleh..mix everything thoroughly and arrange them in fridge for an hour..

Serve chilled ..

Thursday, June 10, 2010

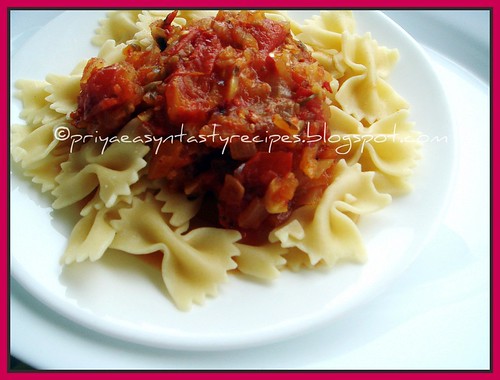
Universal Tomato Pasta Sauce - T&T From Zlamushka's Spicy Kitchen

Pastas, fabulous dishes anyone from any part of  theworld will definitely love this famous Italian dishes, sometimes its quite easy to prepare pastas but the sauce served along with pastas needs bit more time to get ready, I found out this Universal tomato pasta sauce at Zlamushka's space and i got hooked to this sauce coz its very simple to prepare, quick and the sauce will get ready soon, u can serve this sauce with pastas along with any sort of meats, veggies or with any sort of cheeses, making out this sauce in huge quantity and conserving them in air tightened bottle can be very handy if u r in rush or busy in work or watever else, just add any meats or veggies while reheating this sauce and enjoy this sauce along with ur pasta..I prepared a large bottle full of this sauce and even this sauce suits very well even for making out pizzas, thanks a lot to Zlamushka for sharing this wonderful pasta sauce...

Tomato Pasta Sauce

3nos Onions (chopped)
6nos Tomatoes (chopped)
5nos Garlic cloves (crushed)
6no Sun dried tomato (chopped)
1/4tsp Chilli flakes
1tsp Sugar
Salt
Pepper
2tbsp Parsley leaves (chopped)

Heat enough olive oil, saute the chopped onions and crushed garlic, add the chilly flakes and sugar , saute until the sugar get caramelized, now add the chopped tomatoes,sun dried tomatoes..saute everything well, cook in simmer for 10 minutes, finally add the salt, pepper powder and chopped parsley leaves, continue cooking for 10 minutes again..

Let them get cool completely and conserve them in an air tightened bottle..enjoy with any sort of pastas..

Bottlegourd Wraps - T& T from Dil Se..

I have bookmarked this bottlegourd wraps long back at Divya's Dil Se.., her blog have many authentic and traditional dishes where sometime we will get lost ourselves wat to choose and cook, with many simple and elegant dishes her space tempt us to go through and u will definitely enjoy browsing in her blog..This bottlegourd wraps goes for simple ingredients with our Indian touch..I love tortillas and this Indianized version of bottlegroud wraps tastes too delicious simply when served with few ketchup, everyone at home enjoyed this easy breezy wraps, a fabulous wraps even whoever doesnt like bottlegourd stir fry will definitely like this wraps..

Bottlegourd wraps

4nos Tortillas or Chappathis (i used maida chappathi)
1cup Bottlegourd (peeled and cut as small cubes)
3tbsp Channa dal (soaked for an hour)
1/2tsp Mustard seeds+Cumin seeds
1/2tsp Chilly powder
1tbsp Grated coconut
1/4tsp Turmeric powder
Salt
Oil
Few curry leaves

Heat enough oil, let splutters the mustard seeds and cumin seeds, add immediately the soaked and washed channa dal,curry leaves fry for few minutes, now add the bottlegourd cubes with turmeric powder,chilly powder and salt, springle some water and cook in simmer until the veggies get well cooked..finally add the grated coconut and put off the stove..let them cook completely..

Meanwhile heat the chappathis or tortillas on both sides for few seconds, arrange enough bottlegroud stir fry in the middle, roll them as wraps..Serve with ketchup or any hot sauces..This wraps can be enjoyed as a snack or for lunch or else for dinner along with simple salad..

Wednesday, June 9, 2010

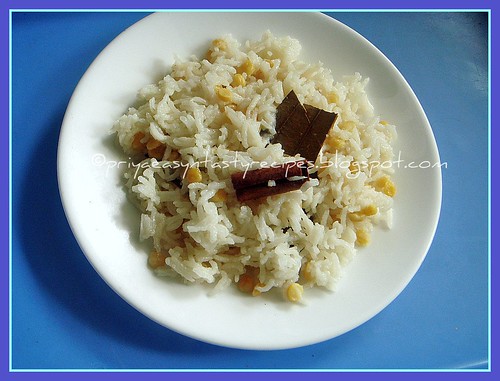
Burmese Butter & Lentil Rice / Pe Htaw Bhut Htamin

I really love to cook and taste different cuisine around the world...This time my culinary experiments goes for Burmese cuisine, after going through many recipes and sites i have choosed few easy breezy recipes to try out..While going through those recipes, i found that most of Burmese dishes ressembles quite like our Indian dishes..Coming to this butter and lentil rice, this dish is really very easy to prepare, this rice goes for simple ingredients and the bay leaves, cinnamon stick used in this rice turned them out more flavourful ..This rice is a fabulous alternative dish to plain rice.. Its seems Burmese people enjoy this rice either with some dried shrimp relish or with crispy onions or else with rich meat curries..We had this rice simply with potato kurma and enjoyed a lot..

Burmese rice

2cups Basmati rice
1/4cup Channa dal (soaked for 4 hours)
2tbsp Butter
1tsp Sugar
Salt
4nos Bay leaves
2nos Cinnamon stick
4cups Water

Wash the soaked channadal and drain well..In a pan, add the rice , channadal, butter, sugar, salt, bay leaves, cinnamon stick and water, cover the saucepan and bring to boil, keep an eye while cooking and stir occasionally..

Put the flame in simmer and cook until the water get absorbed and the rice and dal get cooked..let them aside..serve hot with any sort curries..

Eggplant & Bellpeppers Pepper Masala

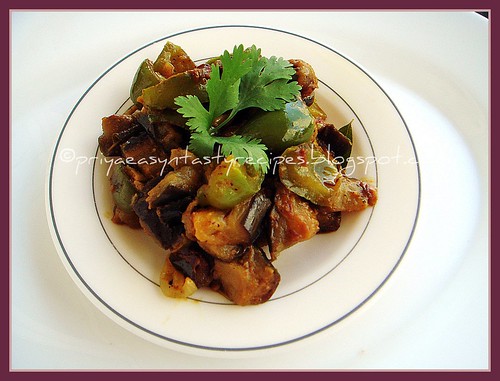
Some of the events going through this blogsphere inspires u very much and will definitely pull u to think more than your creativity..Usually i prepare this eggplant and bellpeppers masala simply with red chilly powder and with a grounded paste prepared with grated coconut and fennel seeds, but this time my version of this usual masala went for freshly grounded pepper powder and garam masala in which i have added some coconut milk to enhance the flavour of this dish..Pepper and garam masala used in this dish turned out this simple masala more tasty and this masala goes prefectly as side dish for any rice dishes as well as along with rotis..Quick, easy at the same time..

Eggplant pepper stir fry

1no Eggplants (cubed)
1no Green bellpepper (cubed)
1no Onion (chopped)
1no Tomato (chopped)
4nos Garlic cloves (crushed)
1tsp Pepper powder
1/4tsp Red chilly powder
1/2tsp Garam masala powder
1/2tsp Coriander powder
1/3cup Coconut milk
Salt
Curry leaves
Oil
1tsp Mustard seeds+Cumin seeds

Heat enough oil, let splutters mustard seeds and cumin seeds, add immediately the chopped onions, chopped tomatoes, crushed garlic cloves, curry leaves with salt and saute until the veggies get well cooked, now add the cubed eggplant chunks,saute for few minutes..add the pepper powder,red chilly powder,garam masala powder, coriander powder, saute everything for few minutes, finally add the cubed bellpeppers, toss everything gently..now add the coconut milk and cook everything well until the oil get separates..

Serve hot with rice or rotis..

Tuesday, June 8, 2010

Minty Avocado Lassi

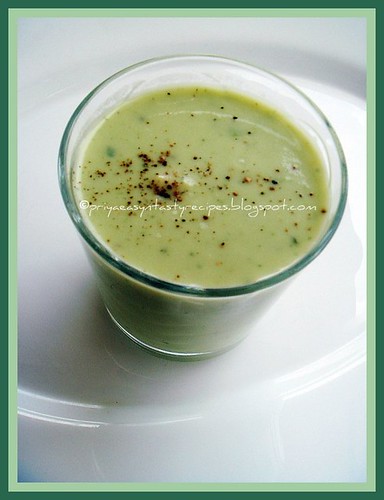
Have you ever thought of making spiced lassi with avocado, but i did and finally i have accomplished by making spiced avocado lassi with mint leaves..This green lassi is quite a thirsty quencher suits prefectly for hot sunny days..I have never tried out lassi with avocado before, so before preparing this gorgeous green lassi i was quite anxious about the taste, but truly with mint, pepper powder, lemon juice and chaat masala this lassi tastes very refreshing and tasty..I was quite happy to see that everyone at home enjoyed having this minty avocado lassi....

Avocado Lassi

1no Avocado
2cups Yogurt
5nos Mint leaves
1/4cup Milk
1tsp Lemon juice
Pepper powder as per need
2pinches Chaat masala
Salt

Scoop out the flesh from the avocado and blend as smooth lassi with yogurt, mint leaves, lemon juice, salt and milk..finally add the pepper powder, chaat masala, give a stir and serve immediately with ice cubes..

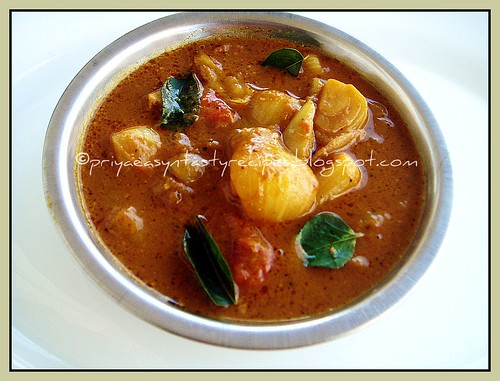
Tangy Shallots & Pepper Gravy/Venkagaya Milagu Kuzhambu

Most of our Indian dishes are loaded with many medicinal values. we cant live without onions, tomatoes and many more spices, without these ingredients u cant cook any Indian dishes..This milagu kuzhambu was one of my grandma's signature dish which she usually used to prepare atleast once a week whenever we go to her village, she serve us either with hard boiled eggs or papads and this gravy tastes tremendously delicious after a day and goes awesome as side dish with any dishes, this gravy can be a side dish for idlies or dosas for breakfast, again this tangy gravy goes prefectly with hot piping rice for lunch and as a delicious side dish even along with rotis.

Sometimes we call this gravy as all purpose gravy as this gravy can goes prefectly with any sort of dishes..Whenever i prepare this gravy, we guys love them with papads or simply with vadams..One of my comforting food which makes me always nostalgic..This gravy suits prefectly if anyone at home suffer from cold or cough also for digestion..

Onion & Pepper Kuzhambu

1cup Tamarind juice
15nos Shallots (diced)
1no Tomato (crushed)
1tsp Pepper powder
1/4tsp Turmeric powder
1/2tsp Red chilly powder
1tsp Coriander powder
1tsp Mustard seeds, cumin seeds & Fenugreek seeds
Few Curry leaves
5nos Garlic cloves (crushed)
2tbsp Gingelly oil
Salt

Heat the gingelly oil, fry the mustard seeds, cumin seeds, fenugreek seeds until they turns brown, add immediately the crushed garlic cloves, curry leaves and fry for few minutes, now add the diced shallots, crushed tomatoes and cook until the veggies gets cooked, meanwhile add the pepper powder,turmeric powder, red chilly powder, coriander powder, salt to the already prepared tamarind extract, mix everything well..Add this spiced tamarind juice to the cooking veggies and cook until the oil get separates..

Enjoy with any dish..

Monday, June 7, 2010

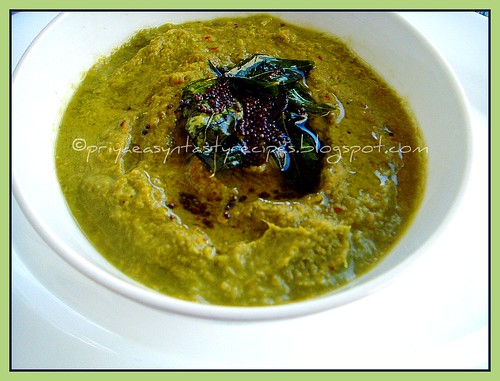
Ridgegourd Peels & Spring Onions Chutney

We know that everything in ridge gourd can be used as curries or chutneys..My mom usually used to prepare the ridge peels with sesame seeds or with grated coconut as chutneys, i tried to prepare this ridge gourd peels chutney this time with green spring onions along with dry red chillies, urad dal, tamarind and grated coconut, this chutney tastes terribly delicious with hot steaming idlies and crispy dosas for breakfast and along with spicy tangy gravies for lunch..We enjoyed having this mild green chutney with rice and onion & pepper kuzhambu today for our lunch..Both together turned out our lunch prefect, we loved it..Quick and delicious chutney goes awesome even with rotis..

Ridge gourd peel & Spring Onions Chutney

1cup Ridge gourd peels
1cup Green spring onions
4nos Dry red chillies
1no Tamarind (blueberry size)
1tbsp Urad dal
2tbsp Grated coconut
Oil
Salt
1/2tsp Mustard seeds
Few curry leaves

Heat few drops of oil, fry the dry red chillies, tamarind and urad dal until they turns golden brown, take them in a mixie jar, in the same pan, saute the ridge gourd peels, green spring onions until they shrinks a bit..grind this sauteed peels and spring onions along with grated coconut,water and salt until they turn as bit coarse paste..

Heat again enough oil, let splutters the mustard seeds and curry leaves, add immediately to the grounded chutney and serve along with any sort of dishes..

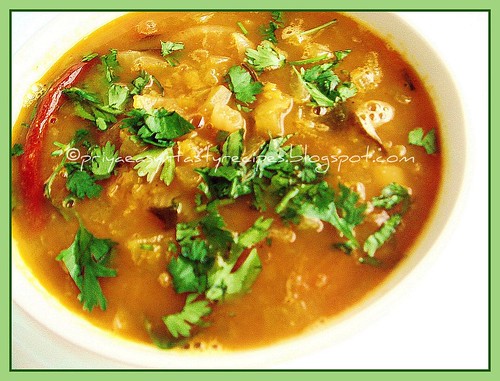
Watermelon Poricha Kuzhambu

Many of us might have know about this poricha kuzhambu, its one of the comforting stew served along or over with hot steaming rice, basically this poricha kuzhambu is prepared with or without tamarind and with dals like toor or mung dal or either with the combination of two..Some goes for sambar powder while others goes for raw or roasted spices with or without coconut..U can prepare this poricha kuzhambu either with a veggie or with mixed veggies u can go for any squashes, eggplants, potatoes etc..You can also make this kuzhambu thicker like kootu or thinner like rasam, its depending upon u and how u planned to serve them, if u wanted to have this poricha kuzhambu with rice, make them thinner or else if u want to serve with rotis makes them thicker.. Its one of the comforting food for me and this time i prepared my poricha kuzhambu with the white part of the watermelon which we usually trash..This watermelon poricha kuzhambu tastes terribly delicious when served with rice topped with ghee and papads...

DSC09910

2cups Watermelon (white part only chopped)
1cup Toor dal +Mung dal
1/4tsp Turmeric powder
1/2tsp Mustard seeds +urad dal
2nos Dry red chillies
Few curry leaves
1tbsp Coriander leaves (chopped)
Salt
Oil

To Roast & Grind
3/4tsp Pepper corns
1tsp Cumin seeds
1/4cup Coconut (grated)
1no Dry red chilly

Cook toor dal, mung dal with turmeric powder,salt ,water and chopped watermelon chunks upto three hisses, put off the stove and keep aside until the pressure get released, meanwhile dry roast and grind as fine paste all the ingredients given in the list 'To roast & grind'.. Now heat the cooked dals & vegetables along with grounded paste and cook until the raw smell goes away..Heat enough oil in a pan, let splutters the mustard seeds, urad dal.. fry the dry red chillies and curry leaves, add this tempered spices to the cooking dals-veggies mixture and put off the stove..

Garnish with coriander leaves and serve with rice or rotis..

Sunday, June 6, 2010

Mixed Veggies Pepper Rice

Weekend is going very pleasant here, yesterday its was quite hot while today its rainy and the climate is just like as we have in Ooty or Kodaikanal, so i was bit lazy to make out non vegetarian dishes today and went for this easy breezy pepper rice i used to prepare often with many variations, sometimes i'll prepare this simple pepper rice with chicken chunks, shrimps or with eggs, this time i prepared simply with veggies ,soyasauce and spiced this rice with freshly grounded pepper powder, a prefect lunch box menu which goes awesome with boiled eggs or simply with chips, my mom used to prepare this simple and delicious pepper rice for my sister which she used to carry along with her when she was doing her schooling as her school was quite far from our home..While preparing this pepper rice, my mom used to reserve few for me and my brother and we have this peppered rice once we come home for our lunch, they stay always tasty even if she prepare earlier in the morning..

DSC09913

2cups Cooked rice
1cup Mixed veggies
2tbsp Soya Sauce (light)
1tsp Pepper powder (freshly grounded)
1/2cup Chopped Spring onions (white & green)
Oil
Salt

Heat enough oil and saute the white part of the spring onions, until they turns transculent, add immediately the veggies and salt, cook until the veggies turned half cooked..now add the soya sauce and cook the veggies in high flame, add immediately the rice and pepper powder toss everything gently until everything get well mixed, finally add the chopped green spring onions and serve immediately with eggs or papads..

Friday, June 4, 2010

Watermelon & Cucumber Raita

Its kinda hot here and we are getting hooked to fresh juices and summer fruits like watermelon, peach and strawberries, after having those sweet watermelon chunks before throwing the green part, i removed that white part of the watermelon for making out some dals with those white part..While making out our usual cucumber raita i tried adding some grated watermelon along with cucumber and the crunchy texture of this watermelon tasted very fabulous and both cucumber and watermelon works out wonder together and we loved it, enjoyed having this creamy watermelon and cucumber raita with Chettinad Mutton Biryani..Easy breezy and refreshing raita get ready within few minutes and goes awesome even with rotis..To grate the white part of the watermelon will be bit tricky but this raita will tastes super delicious;.

Watermelon & Cucumber Raita

1/2cup Grated watermelon (white part only)
1cup Cucumber (grated)
1cup Thick yogurt
Few coriander leaves (chopped)
Salt

Take the grated watermelon, grated cucumer, thick yogurt, chopped coriander leaves,thick yogurt , mix everything well and let them sit in fridge..

While serving add enough salt and serve along with pulaos or briyanis..


Pepper Yam Stir fry

Usually we prepare yam as pakodas with besan and rice flour, else sometimes as masiyal with cooked yam chunks, this pepper yam stir fry is one of the most easiest and tastiest stir fry i ever prepared and its gets ready within less time and tastes too good along with any sort of rice..Eventhough its kinda hard to slice and chop this veggie, we love it much and our most favourite is Kola urundai with this yam chunks..Simple, easy and delicious side dish goes awesome mostly delicious along with rasam and curd rice, both together tastes absolutely divine even people dont like this yam will definitely love this delicious stir fry...

DSC09916

1/4kg Yam
1tsp Mustard seeds+Urad dal
1/2tsp Red chilly powder
1/2tsp Coriander powder
1/4tsp Turmeric powder
3/4tsp Pepper powder
Salt
Curry leaves
Oil

Peel and chop the yam as large pieces, cook in water along with turmeric powder until the yam pieces gets slightly cooked, drain the excess of water and let them get cooled..

Now chop the cooked yam pieces as small cubes..heat enough oil, let splutters the mustard seeds & urad dal along with curry leaves, add immediately the chopped yam cubes along with red chilly powder,salt, coriander powder and salt, cook everything in simmer until the yam pieces get well mixed, close the pan with a lid and cook in simmer until the oil gets separates, finally add the pepper powder, toss everything gently and put off the stove..

Enjoy this peppered spicy yam stir fry with curd or rasam rice..


Thursday, June 3, 2010

Strawberry N Pineapple Salad

Who will say no when u r served with love by ur better half even with a simple salad, definitely not me..Coz my better half is quite a busyman with loads of work and its very rare to catch him often especially during week days, yesterday after a long month of work, he got enough time to spend his precious time with us and prepare this simple salad for us with loads of love, even this salad is simple i wanted to share along with u all coz am so proud of him also simple but yet a delicious salad to enjoy without any guilt as my H prepared with maple syrup and some nuts with loads of strawberries and pineapple chunks..We enjoyed this salad for our dessert...

Strawberry & Pineapple Salad

1cup Strawberries (chopped)
1cup Pineapple chunks
Maple syrup as per need
Few almond flakes

Take everything in a bowl, mix well and serve chilled...

Wednesday, June 2, 2010

Announcing Global Kadai - Indianized French Toast

Am very happy to host this month's Global Kadai Event with Indianized version of French toast as theme..Wat is Global Kadai?? most of us would have already seen or prepared many Indianized version of International dishes either from our kitchen or in some of the restaurants..This Global Kadai Event is created by Cilantro is to bring out those Indianized version of International dishes and every month this event goes for an International dish which should be prepared with our creative mind using familiar Indian ingredients.... Personally i cant stop myself to make out many dishes without our Indian touch, even if prepare sometimes french toast at home i 'll prepare them either by stuffing with meats or seafoods, either as savoury or sweet and sometime as with veggies..I have to say a big thanks to Cilantro for letting me to host this beautiful event..

Typical French toast is made with bread and eggs. Milk or sugar is commonly added. According to what is popular in local cuisine, many of the spices that are added to bread or egg dishes are included in cooking. This versatile dish is often topped with sugar, butter, fruit, syrup, or other items.In United Kingdom, this french toast are called as egg bread, while in France we call these french toast as 'Pain Perdu' which means lost bread..

You can make french toast with many variations with anything and send them to my mailbox, just bring out ur imagination and ur creativity by making out many yummyilicious toasts..Wat u need to do is:


1) Use your imagination and creativity to prepare french toast using ingredients familiar in Indian Cuisine(Veg & Non Veg entries are allowed).. Post your entries on your blog from today to 30th june..

2) If you already have appropriate entry archived, send it immediately to me.  No limit on the number of entries.

3) Provide a link back to this announcement page and also to CIlantro's Announcement Page and feel free to use the logo..

4) Email your entry to Priyasuresh09@gmail.com with following details
 Your Name
 Blog Name
 Blog URL
 Recipe URL
 Photograph of final dish.

5)The deadline for this event is 30th June , 2010.

6)If you don’t have a blog but wanted to participate in this event, send your entries with a picture, your name and recipe to mentioned mail address before the deadline..

Tuesday, June 1, 2010

Ragi & Spring Onion Pakodas

Even deep fried dishes arent that much healthy, sometimes we cant say no to those deep fried beauties, here is one among those beautiful and nutritious pakodas with ragi flour and spring onions..When i was kid, my grandma  used to make out these crispy pakodas with ragi flour for our snacks during our summer vacation, we enjoy these crispy pakodas whenever my grandma prepare, none will beat her way of making out this crispy pakodas that much perfect, these pakodas brings me loads of cherishable moments..I prepared this pakodas as the same way my grandma used to prepare but with my personal touch, yeah i have added a cup of spring onions to make them more tasty and we enjoyed having these crispies for our snacks..

Ragi and spring onion Pakoda

2cups Ragi flour
1cup Spring onions (chopped)
4nos Green chillies (chopped)
1tbsp Ginger (chopped finely)
4nos Garlic cloves (crushed)
Few curry leaves
Salt
1tsp Fennel seeds (crushed)
Oil for deep frying

Mix together the ragi flour, chopped spring onions, chopped green chillies, crushed garlic,curry leaves, crushed fennel seeds and salt together, springle some water and mix everything well (take care not to turn the dough too watery)..Heat the oil for deep frying, springle the ragi-spring onions mixture little by little to the hot oil, fry until they turns crispy..Drain the excess of water with a paper towel..

Store in an air tightened box and enjoy for snacks..