Pages

Friday, November 30, 2012

Eggless Molten Lava Cake

Molten lava cake are always baked as single serving cake in ramekins and they have four main ingredients.Molten lava cake is quite a popular dessert, for our this month's Baking Eggless we have to bake an eggless molten lava cake. This month's challenge recipe was suggested by Sowmya of Nivedhanam. Eggless molten lava cake was quite tricky than the usual lava cake with eggs, i tried the recipe suggested by Sowmya but the first try didnt turned out good,fortunately i tried with less quantity. For the second try, i tried adding the equal amount of chocolate,butter,condensed milk. This time eggless molten lava cake turned out prefectly.

I prepared 5 ramekins of this cake, but they vanished very quickly and i just struggled to click this picture as my lil one started screaming to have the cake. I couldnt even transfer this cake to a serving plate as my lil one finished already half of the cake.Since lava cake should be cooked like cake and while having the melted chocolate will oozes out when you cut the center of the cake, i added a chocolate pieces in each ramekins.I'll be making some soon again,as this eggless lava cake is a big hit at home among my kids.Sending to 60days of Christmas hosted by Priya and Divya.


1cup All purpose flour
1cup Butter (room temperature)
1cup Sweetened condensed milk
100grms Dark chocolate
1/2tsp Baking powder
1 pinch Baking soda
5nos Chocolate chunks

Sieve the flour with baking powder and baking soda,keep aside.

Melt the chocolate with butter in microwave oven for 2minutes.Add the sweetened condensed milk,to the melted chocolate, mix well.

Preheat the oven to 350F.

Finally add the flour and mix well. Fill the well greased ramekins with enough batter, drop a chocolate chunk to the center of the ramekin, take care to cover well the chocolate chunk.

Bake for 15minutes in middle rack.Let the ramekins sit for 5minutes.

Invert the cake to a plate.

Serve the cake  dusted with icing sugar or with icecream

Thursday, November 29, 2012

Mutton Kurma-Pressure Cooker Method

If am in hurry or feel like lazy to cook, i know i'll be making my dinner or lunch with my pressure cooker. Every trip to India,we never forget to get a new pressure cooker, even if someone ask me wat to get for me from India, i'll ask them to bring me the recent one, needless to say i have a bunch of pressure cookers with different sizes and brands.While going through my non vegetarian recipe list, i wasnt able to see my usual pressure cooker method mutton kurma, recently i prepared this quick version of my mutton kurma for our weekend lunch and clicked it without any fail to post it today.

Since this kurma is prepared through pressure cooker, the cooking time goes for less time when compared to the usual stove top method. Usually some cook their meat through pressure cooker and prepare their kurma separatly in an another vessel,but this kurma gets ready completely through pressure cooking.If you dont have enough time to cook your sunday mutton kurma for lunch, this pressure cooker method will help you definitely.Sending to 60days of Christmas hosted by Priya and Divya and  to Jaleela's Bachelor's Feast.


1/2kg Mutton with bone(fat removed,washed and cleaned)
2nos Onions (chopped)
2nos Tomatoes (chopped)
1tbsp Ginger garlic paste (for marinating)
1tbsp Ginger garlic paste
1/2cup Yogurt
1tbsp Lemon juice
1tbsp Coriander powder
1/2tsp Red chilly powder
2nos Green chillies (slit opened)
1/4tsp Turmeric powder
2nos Whole spices (bay leaves,cloves,cinnamon stick,cardamom)
1tsp Fennel seeds
1/4cup Mint leaves (chopped)
Oil

To grind:
2tbsp Poppy seeds(soaked in hot water)
4tbsp Grated coconut
5nos Cashew nuts

Marinate the mutton pieces with the ginger garlic paste,yogurt,lemon juice,salt,chilly powder and turmeric powder and keep aside for an hour.

Grind poppy seeds,grated coconut and cashew nuts as fine paste and keep aside.

Heat enough oil in a pressure cooker, fry the bay leaves,cloves,cinnamon sticks,cardamom seeds, fennel seeds until they turns brown.

Add the chopped onions,chopped tomatoes,ginger garlic paste and slit opened green chillies,cook everything until the raw smell goes away.

Now add the marinated mutton pieces,coriander powder,salt and cook for few minutes.

Add enough water and cook for few seconds,once the gravy starts boiling add the grounded paste,cook for few minutes.

Close the lid of the pressure cooker and cook upto 5whistles.

Once the steam gets released, add the chopped mint leaves and give a stir.

Serve hot with rice or rotis.

Wednesday, November 28, 2012

Pumpkin Barley Waffle

Waffles with nutella,who can resist to this beautiful pair. For our weekend breakfast, i quickly prepared this catchy pumpkin barley waffle and my kids enjoyed thoroughly. Usually i'll go for eggfree waffles, but this time these waffles have eggs in it, if you want to skip it you replace it very well with applesauce. You can check my eggfree sugarfree barley waffles to get an idea about eggless waffles. With a cup of coffee or a bowl of warm milk, these waffles goes awesome and you will have a super filling,healthy breakfast.Sending to my own event CWS-Barley guest hosted by Roshni and  to my event Healthy Diet-Fast & Quick Healthy Dish guest hosted by Kalpana.


1cup Whole wheat flour
1cup Barley flour
2nos Eggs
1/4cup Pumpkin puree
2tbsp Olive oil
1/4cup Sugar
1tsp Baking powder
1tsp Vanilla extract
2cups Milk

Preheat the waffle maker.

Sieve together the flours and baking powder, beat together the eggs,sugar,pumpkin puree,vanilla extract,oil and milk, gradually add the wet ingredients to the dry ingredients and turn as a batter.

Pour a ladle of batter to the waffle maker until they get cooked..

Serve with a cup of warm milk with nutella spread,jams or simply with maple or agave syrup.

Tuesday, November 27, 2012

Baath Cake - Goan Semolina & Coconut Cake~~My Guest Post for Priya

Guest posting, love the friendship behind this. This baath cake is my 8th guest post i prepared specially for one of my blogger buddy aka one of my virtual sister Priya of  Cook Like Priya.

Christmas is one of the festival we never failed to celebrate here, the chilled weather of december gives a wonderful festive mood and every year we wait eagerly for this festival.

When Priya asked me something christmassy, initially i want to make a christmas special bread from Europe. Finally after many hesitation,i went for an Indian christmas cake.I usually bake the famous plum cake,somehow i dont want to reproduce the same for this guest post. I know Goan makes many traditional christmas special bakes every year and Baath cake is among them.

Coming to this Baath cake,this cake is prepared with freshly grated coconut and semolina, with less butter this cake goes for an easy breezy preparation. With a wonderful texture,this cake tastes fabulous and melt in mouth.Goans prepared this cake traditionally in clay oven for every christmas and definitely this cake have its own place in every home during christmas.


Even blogging is a virtual world, am blessed to get a decent number of wonderful friends.I can say that Priya R of Cook Like Priya is one among them, she is a very friendly food blogger, fabulous photographer. I started chitchatting with her after we joined a monthly baking event.She shares wonderful traditional dishes to mindblowing bakes with her own touch,eventhough i have numerous favourites in her space my recent favourite post of her is this Choco Beet Cake.


3 nos Eggs
1 cup Semolina (fine quality)
2 cups Grated fresh coconut
1+1/2 cups Sugar
3 tbsp All purpose flour
1 tbsp Corn flour
1/2 tsp Salt
2 tsp Baking powder
3 tbsp Butter (room temperature)
1 tbsp Vanilla essence
1/2 cup Warm water
Few dry fruits

Beat the eggs till they turns fluffy and add the butter to it,beat again for few minutes.

Grind the grated coconut with warm water to make a thick coarse paste.

In an another bowl, take the semolina,all purpose flour,baking powder,cornflour,salt and sugar and mix well.

Now add the grounded coarse coconut paste,beaten eggs gradually to the dry ingredients.Mix everything well with a spatula.

Cover it and keep the above mixture for 8 hours in room temperature (if the climate is chilled) or over night for best results.

If the climate is hot, cover this cake batter and keep in fridge for 8 hours or overnight, remove an hour earlier to bring it at room temperature before baking. Finally add the vanilla essence and give a stir.

Preheat the oven to 170C. Transfer the cake batter to a well greased round or square mold. Top it with dry fruits. Bake for 30-35 minutes until a skewer inserted comes out clean.

Your Baath Cake is ready.


Check Priya's space for my guest post

If you want something different for your christmas celebration this year, dont hesitate a second to give a try to this fabulous cake.

Monday, November 26, 2012

Chilly Mini Idly with Chickpeas

Usually chilly idlies are prepared with leftover idlies,i prepare my idly batter once a week. Obviously we always have leftover idlies at home. Sometimes i finish them as upma or else i'll reheat it and have with any chutneys.For the third day of blogging marathon, i combined leftover mini idlies with leftover cooked chickpeas for making this chilly idly, both together turned out dinner simply awesome.

For my surprise even my daughter who hates idlies enjoyed thoroughly and everyone at home loved it.This chilly idly goes for a easy breezy preparation,you can add very much any sort of veggies but i just went for cubed green bellpeppers and chickpeas.Since i had mini idlies, i added them directly to make this dish, in case if you have usual idly, just cut them as small cubes and make out this dish.Sending this rice to my event Healthy Diet-Fast & Quick Healthy Dish guest hosted by Kalpana.Check out the marathoners running this 22nd edition of blogging marathon here.


15nos Mini Idlies
1/2cup Cooked chickpeas
1no Onion (big & sliced lengthwise)
1tsp Ginger garlic paste
2tbsp Tomato ketcup
2tbsp Soya sauce
1tsp Chilly sauce
1/4tsp Garam masala powder
1no Green bellpepper (cubed)
Oil

Heat oil, add the sliced onions,ginger garlic paste and saute until the onions turns transculent.

Add now the cubed bellpeppers, saute for few minutes.

Add the mini idlies,chickpeas, saute for few minutes.

Finally add the ketchup,soya sauce,chilly sauce and garam masala,cook until the idlies gets well coated.

Serve hot immediately.

Sunday, November 25, 2012

Chickpeas Sesame Rice

For my second day of blogging marathon with cooking with chickpeas as theme, i choosed to make something different with rice. Usually i make atleast once a month our favourite flavourful,healthy sesame rice. Sesame rice gets ready very quickly when compared to any other one pot meal. This rice goes for a quick spice powder with dry roasted sesame seeds along with some spices mixed with rice and tempered with spices.

This time for a change, i tried adding cooked chickpeas to my usual sesame rice, for my surprise this combination rocks.I simply served this rice with fried potatoes and both this flavourful rice and spice potato fries turned out our yesterday's lunch simply awesome. Next time,if you are making sesame rice at home,do try adding few chickpeas and you will definitely know the difference.Sending this rice to my event Healthy Diet-Fast & Quick Healthy Dish guest hosted by Kalpana.Check out the marathoners running this 22nd edition of blogging marathon here.


1/4cup Sesame seeds(i used white sesame seeds)
6nos Dry red chillies
2tbsp Urad dal
2tbsp Coriander seeds
2cups Cooked Basmati rice
1/2cup Cooked chickpeas

For Tempering:
1/4tsp Mustard seeds
1/4tsp Urad dal
2nos Dry red chillies
few Curry leaves
2tbsp Oil

Dry roast sesame seeds in simmer until they turn golden brown.

In tha same pan dry roast the dry chillies then followed by coriander seeds and urad dal..keep aside and let them get cool.

Grind as fine or coarse powder with enough salt and store them in a air tightened box..

Add this spice powder to the cooked rice as much as you desire.

Meanwhile heat the oil and fry the mustard seeds,urad dal, dry chillies and curry leaves,finally add the chickpeas and cook for few seconds.

Add immediately this tempered spices to the rice and toss gently until the rice get well mixed,add salt if needed..

Enjoy this dish with potato fries.

Saturday, November 24, 2012

Eggplant & Chickpeas Dal

Here we go for a week of blogging marathon, this week's theme is going to be Cooking with chickpeas. Obviously my next three dishes are going to be chickpeas based dishes. For today's post, am posting this thick chickpeas and eggplant dal based curry, this dish hardly needs less than 15minutes and this dal goes for a quick preparation. This curry goes for pressure cooking and few roasted spices with eggplant and cooked chickpeas.

This dal goes awesome with anything, we call it as three in one dal, coz you can serve this delicious dal with idlies or dosas for breakfast, with rice for lunch and with rotis for dinner.Usually i make this dal quite often just with eggplants,for a change i tried this time with chickpeas and both works out wonder.


1/2cup Split yellow moongdal
3cups Eggplants (cubed)
1cup Chickpeas (cooked)
1no Onion (chopped)
1no Tomato (chopped)
3nos Green chillies (slit opened)
1/4tsp Turmeric powder
1tsp Lemon juice
1/2tsp Mustard seeds
1/2tsp Urad dal
2nos Dry red chillies
Few curry leaves
Oil
Salt

To roast & grind:
2tbsp Coriander seeds
1/2tsp Asafoetida powder
1/4tsp Fenugreek seeds
3tbsp Coconut (grated)

Take the washed moongdal,cubed eggplants, half cup of chickpeas,chopped onions,chopped tomatoes,slit opened green chillies with turmeric powder,salt and enough water in pressure cooker.

Close the cooker with lid and pressure cook for 3 whistles.

Meanwhile dry roast the ingredients under the list 'to roast & grind' as fine powder.

Once the steam gets released, smash the cooked veggies and chickpeas with a spatula.

Now add the grounded roasted spice powder,remaining chickpeas to the dal and cook everything in simmer.

Adjust the thickness of the dal with enough water.

Finally heat the oil, lets splutter the mustard seeds,urad dal, add the dry red chillies,curry leaves and fry them.

Add this tempered spices,lemon juice to the dal and give a stir.

Serve hot with rice.

Friday, November 23, 2012

Eggless Thumbprint Chocolate Cookies

I have already posted a super attractive thumbprint cookies with custard powder,everyone at home enjoyed thoroughly those cuties, from that day my lil one started asking me to make again with chocolate. This weekend,he bugged me very much and finally i finished making some with an easy chocolate sauce,you can replace very well this chocolate sauce with nutella spread.

Since i ran out of the nutella, i prepared quickly a ganache like chocolate sauce. These cookies are big hit at home again and we couldnt stop munching these beauties.These attractive cookies tastes absolutely incredible,quite addictive,super buttery and definitely a kid pleaser. As usual i prepared my thumbprint cookies as eggless version,if you dont like chocolate filled cookies, you can go very well for any kind of jams.


1+1/2cups All purpose flour
1/2cup Butter (room temperature)
1/4cup Confectioner's sugar
1tsp Vanilla extract
2 tbsp Milk

For chocolate sauce:
1/4cup Dark chocolate bar (chopped roughly)
2tsp Butter
1tbsp Cream


Preheat the oven to 350F, line a baking sheet over a baking tray and keep aside.

Whisk the butter,confectioner's sugar together until they turns creamy, add immediately the flour,vanilla extract ,milk and gently mix until they forms as a soft dough.

Shape the dough into small walnut sized balls and flatten them gently. Place them on the lined baking tray.

Make an indentation in the middle of the each cookie and bake for 15-20minutes.

Meanwhile heat the chopped dark chocolate chunks,butter and cream in microwave oven for 2 minutes,whisk it well to make a thick chocolate sauce.

Once the cookies gets cooled, fill the cookies with the prepared chocolate sauce.

Enjoy with a cup of tea.

Thursday, November 22, 2012

Barley Chappathi

As i prepared myself barley flour at home,i tried adding them while preparing our favourite chappathis two days back. They came out extremely soft, since i love to make chappathis quite often, i do experiment with many different types of flours. But somehow after oats flour,i loved this barley and wheat flour combo in chappathi. I went for equal cups of both barley and wheat flour for making these chappathis.

You can spice up this chappathi with your favourite spices and i spiced mine with some crushed ajwain aka omam seeds, they gives a wonderful flavour to this simple healthy chappathi.Enjoyed thoroughly our dinner with this chappathi served along with vegetable kurma. .You can even freeze these chappathis for later use and they will stay prefect for months.This will be definitely handy when you are in hurry.Sending to my own event CWS-Barley guest hosted by Roshni.


1cup Wheat flour
1cup Barley flour
1tsp Ajwain seeds (crushed)
Warm water
Salt
Oil for cooking
Flour for dusting

Take the wheat flour,barley flour,ajwain seeds with salt in a large bowl,gradually add the water and knead as smooth and soft dough.

Keep aside half an hour, make medium sized balls from the dough,dust with flour and roll them as rotis.

Meanwhile heat a tawa, drop gently the rolled roti,drizzle few drops of oil,cook on both sides until they gets well cooked.

Enjoy warm with any sort of chutneys.

Wednesday, November 21, 2012

Barley Porridge

If you like to have a bowl of super filling healthy porridge for your breakfast like me, this quick and super healthy barley porridge is for you. Actually i prepared this healthy, filling breakfast porridge with homemade barley rava and went for pressure cooking. Needless to say that this porridge takes hardly less than 15minutes to get ready and i enjoyed thoroughly with some spicy mango thokku for my today's breakfast. A quick breakfast to kick start your day.

For making barley rava, just dry roast the pearl barleys and grind it for few minutes, sieve it to get the flour and the barley rava separately.Store the barley rava and flour separately in an air tight boxes and use it as per need.This barley rava is quite handy for making this kind of wholesome foods.If you are bored of usual oats porridge, give a try to this porridge and am sure you will definitely enjoy this healthy food.Sending to my own event CWS-Barley guest hosted by Roshni and to my another event Healthy Diet-Fast & Quick Healthy Dish guest hosted by Kalpana.


1/4cup Barley rava
1+1/2cups Water
1/2cup Milk
Salt (as per need)

In a pressure cooker, take the barley rava, water and salt, pressure cook for two or three whistles.

Once the steam gets released, finally add the milk to the porridge and stir it.

Serve hot with your favourite thokku or pickle.

Tuesday, November 20, 2012

Cauliflower & Red Rice Flakes Upma

An easy breezy upma,gets ready with less than 15minutes. I prepared quickly this upma yesterday for our dinner as i felt really lazy to make something else. Just added some leftover finely chopped cauliflower florets to make this quick upma more healthier. You can skip cauliflower and add your favourite veggies here. Serve this upma simply with a coconut chutney, both together turns your dinner simply filling.You can also prepare this quick and healthy upma even for your breakfast as it goes for a simple and easy preparation. Dont worry if you dont have red rice flakes,make it with usual rice flakes. Sending this healthy upma to my event Healthy Diet-Fast & Quick Healthy Dish guest hosted by Kalpana.


1cup Red rice flakes/ Sivappu aval
1/2cup Cauliflower florets (chopped)
1no Onion (big & chopped)
1/2tsp Mustard seeds
1/2tsp Urad dal
1tsp Channa dal
Few Cashew nuts
2nos Dry red chillies
2nos Green chillies (slit opened)
Few curry leaves
Salt
Oil

Soak the red rice flakes in water for few seconds and drain the water completely,keep aside.

Heat enough oil, let splutters mustard seeds, urad dal,channadal.

Fry the cashew nuts,dry red chillies,curry leaves, add immediately the chopped onions, chopped green chilies and cook until the onions turns transculent..

Now add the chopped cauliflower, saute them for few seconds.

Finally add the salt, the already washed red rice flakes.

Cook everything in medium flame for few minutes and put off the stove..

Serve warm with some spicy coconut chutney...

Monday, November 19, 2012

Barley Kheer

If you never tried making kheer with barley, you are missing something super delicious and definitely a healthy kheer. I tried making this kheer during this weekend as my daughter asked me to make some kheer,yep she just love this milk based sweet. Since i used pressure cooker for making this barley kheer, this sweet dish gets ready in very less time than the usual stove topped ones.

This delicious,rich looking kheer with few saffron strands and sweetened condensed milk tastes simply awesome and everyone enjoyed thoroughly this kheer. As i choosed pressure cooked recipes for this week's blogging marathon,this kheer suits absolutely prefect for my theme. Check out the marathoners running this 22nd edition of blogging marathon here.Sending to my own event CWS-Barley guest hosted by Roshni and to my another event Healthy Diet-Fast & Quick Healthy Dish guest hosted by Kalpana and to 60days of Christmas hosted by Priya and Divya.


3tbsp Pearl barley (washed)
1cup Milk
1/4cup Sweetened condensed milk
1tsp Cardamom powder
Few saffron strands
Chopped nuts

Pressure cook the pearl barley with a cup of water for 5-6whistles.

Once the steam gets released, add the milk,sweetened condensed milk,saffron strands and cook everything in simmer for few minutes or until the kheer turns bit thick.

Finally add the cardamom powder,give a stir and put off the stove.

Serve warm with chopped nuts.

Sunday, November 18, 2012

Quick Vegetable Sambhar

I can call this sambhar as bachelor's sambhar, yep this dish is really very quick to make and definitely an easy breezy dish, gets ready in very less time. Just you need a pressure cooker, this is a pressure cooker sambhar. I do this sambhar quite often if i have sudden guests at home or else whenever i feel like lazy.This sambhar dont even need onions or garlic, so you can have this gravy for a fasting day. Coming to this sambhar, i used mixed dals and variety of veggies, just put everything together which goes for pressure cooking which i spiced up with sambhar powder, tempered spices and lemon juice.

Whenever i go to farmer's market, back home i usually prepare my frozen veggies either by slicing or chopping them, as they are really handy for making quick foods,also they wont lose their vitamins once they get freezed. If you have frozen veggies,this sambhar is super easy to make. For my second day of blogging marathon, am posting this quick sambhar as i chosed pressure cooked recipes as this week's theme. Check out the marathoners running this 22nd edition of blogging marathon here.Sending to my event Healthy Diet-Fast & Quick Healthy Dish guest hosted by Kalpana.


1/4cup Toordal
1/4cup Moongdal
1/4cup Masoor dal
2cups Chopped mixed veggies (carrot,turnips,eggplants,bellpeppers and potatoes)
1no Tomato (chopped)
1tbsp Sambhar powder
1/2tsp Red chilly powder
1tbsp Lemon juice
1tsp Mustard seeds,urad dal,cumin seeds
2nos Dry red chillies
Few curry leaves
1/4tsp Asafoetida powder
Salt
Oil

Wash the dals together, transfer it to the pressure cooker.

Add the mixed veggies,tomato,sambhar powder,chilly powder, turmeric powder and salt to the dals, add 3cups of water and pressure cook it for 3whistles.

Once the steam get released, mash slightly the prepared sambhar with a spoon and keep aside.

Meanwhile,heat enough oil in a pan, let splutters the mustard seeds,urad dal,cumin seeds and asafoetida powder, add the dry red chillies and curry leaves. Fry it until they turns brown.

Add this tempered spices,lemon juice to the sambhar,give a stir.

Serve hot with rice.

Saturday, November 17, 2012

Mixed Grain & Drumstick Leaves Dal Bath

We are having a nasty chilled weather, i dont felt like cooking for hours in kitchen as the climate keeps me super lazy. This week, am running my third week of blogging marathon with pressure cooked recipes as theme, i cant live without pressure cooker. They makes really our lives easier and anything cooked with them goes hardly for less time when compared with the dishes cooked in pans or in kadais. Srivalli proposed to cook three different dishes for this three days of blogging marathon, i choosed one pot meal,gravy and an Indian sweet cooked with pressure cooker for this week.

Obviously my first dish for this week blogging marathon goes for a hearty and healthy one pot meal with mixed grains, drumstick leaves and mixed dals. This dish will definitely goes for quick cooking and you can enjoy this food anytime of the day served simply with papads, potato chips or else pickles.I used homemade barley rava, foxtail millet, brown rice,wheat rava,quinoa and rolled oats with toor dal,masoor dal and moong dal along with fresh drumstick leaves. You can also add veggies in this healthy food or else any other greens as you prefer.


1cup Mixed grains
1/2cup Mixed dals
1/4tsp Turmeric powder
1tsp Lemon juice
1tbsp Sambar powder
Salt
Few curry leaves
1/2cup Drumstick leaves
1tbsp Ghee+oil
1tsp Mustard seeds& urad dal
1/2tsp Cumin seeds
2nos Green chillies (slit opened)
2nos Dry red chillies
Few curryleaves
1/4tsp Asafoetida powder
Salt

Wash and soak the grains and dals together for 15minutes in 4 cups of water and keep aside.

Take now the soaked grains and dals with drumstick leaves, turmeric powder,sambar powder,salt in pressure cooker along with their soaked water,close the cooker with the lid and pressure cook upto 3 whistles.

Meanwhile heat the ghee or oil in a pan, fry the mustard seeds,urad dal,cumin seeds,dry red chillies,slit oepend green chillies and asafoetida powder, add the curry leaves, fry for few minutes.

Once the steam gets off, open the lid and add this tempered spices and ghee, give a stir and finally add the chopped coriander leaves and lemon juice.

Toss gently and serve hot with papads or any spicy side dishes.

Friday, November 16, 2012

Khakhra~~IC Challenge

Khakhras are crispy flat Indian bread quite famous in Gujarat, actually i came to know about this roti once i entered this wonderful blogsphere. To be honest without any knowledge about this crispy bread i have already prepared them when i was kid. Yep when i cooked my first chappathi, it turned out super crispy rotis as i overcooked it. Unfortunately i dont know about this Khakhras else i would have managed myself saying that i prepared the Gujarati famous bread when my mom scolded me for my overcooked almost burned rotis.These Khakhras can be prepared with variety of spices,greens and simply just with wheat flour.

Obivously i choosed simple,quick,easy breezy wheat khakhras. Vaishali of Ribbon's to Pasta's shared her friend's recipe for this month's Indian Cooking Challenge. Thanks Valli and Vaishali, we had our khakhras with spicy Andhra gongura pickle  prepared by my aunt who lives in Hyderabad. Both together tastes simply awesome, just loved this crispy khakhras with gongure pickle.


1cup Wheat flour
Salt
4tbsp Oil
Rice flour for dusting
Ghee (per need)

Take the wheat flour,salt and oil in a bowl,gradually add the water and knead as a soft dough.Keep aside for half an hour.

Heat a tawa in low flame while rolling your rotis.

Dust a medium sized ball of dough with rice flour and roll it as thin possible with a rolling pin.

Now cook the rotis one by one to the warm tawa and gently brush them with ghee.

Stack them one over an another and let them cool completely.

Heat again the tawa, gently place a roti with a towel press it from the sides to the centre,cook them slowly until they turns crisp.

Repeat the same process with the remaining rotis.

Once the khakhras gets cool completely,store them in air tight box and enjoy.

Thursday, November 15, 2012

Small Braid Rolls, Eggless Clove Leaf & Eggless Lion House Rolls

Our this month's Baking Partners challenge was to make either dinner rolls with eggs or eggless dinner rolls. Swathi of Zesty South Indian Kitchen,the brain child of this monthly baking event shared us 7types of dinner roll shapes and asked us to try atleast 3 among them. I chosed to make both eggless and rolls with eggs for this month's challenge. I tried the small braid rolls with eggs while for eggless version i went for clove leaf rolls and lion house rolls.

I followed exactly as the original recipe of dinner rolls with egg which Swathi send to us through mail,but i made a small change in the eggless version dinner rolls ingredients, the original recipe without egg had potato starch or cooked potato since i dont want use it, i skipped it and went for custard powder. Addition of custard powder gives a wonderful colour to my eggless dinner rolls and tastewise we didnt found anything different,my kids just enjoyed thoroughly when i served these dinner rolls along with cream cheese and a bowl of warm soup.However i enjoyed thoroughly this challenge as i like to play with yeast.


Small Braid Rolls:
5cups All purpose flour
1no Egg
1/4cup Sugar
1+1/2tsp Salt
2tbsp Dry yeast
2/3cup Milk powder
2cups Warm water
1/3cup Butter

Mix the water,milk powder together until the milk powder get dissolves.

Add the yeast to the mixture,then add the sugar,salt,butter,egg and the flour, mix everything and knead for a while, its will be sticky.

Now add the 2more cups of flour and knead for another few minutes to get a stiff dough. Finally add a cup of flour and knead again, the dough will be soft and not too sticky.

Transfer this dough to a greased bowl and keep in warm place for 2hours until they double their size.

Sprinkle the counter with a flour and put the dough on the flour.

Flatten the dough as rectangular disc, cut small rectangular disc from the rolled disc.

Make three slits to the small rectangular disc without disturbing the top of the disc, make the braid as show in the video.

Video for Small Brain & clove leaf rolls

Once the braid is ready, keep it again in warm place. Preheat the oven to 350F and brush the small braid rolls with egg yolk and bake for 20-25minutes until the crust turns brown.


                                                          Clove Leaf Rolls (Eggless)


                                                        Lion House Rolls (Eggless)
For Eggless Rolls:
4cups All purpose flour
2tsp Instant year
1/4cup Custard powder
1cup Lukewarm milk
2tbsp Sugar
1tsp Salt
4tbsp Butter
1/4cup Milk + 1tsp sugar for brushing

Take the flour,salt,sugar,yeast,custard powder and butter in a bowl..

Mix everything well,now add the lukewarm milk and knead everything as a soft dough, again knead to dough for few more minutes until they turns elastic.

Keep in a warm place until they double their size.

Punch the dough and prepare rolls with the shapes as you desire.

Simply roll the dough and pinch down three small balls from dough,place them to a muffin mould and keep aside to double their size,this is clove leaf roll.

Roll the remaining dough as a rectangular disc, cut it in the middle and cut them as small sized rectangular disc, and roll over them, arrange in a greased plate to rise until they double their volume, this is lion house rolls.

Watch here for Lion house rolls

Preheat the oven to 350F, mix the milk and sugar for brushing and  brush the dinner rolls on the top.

Bake for 20-25minutes or until the turn turns golden brown.

Let them cool completely and enjoy with your favourite spread.

Wednesday, November 14, 2012

Easy Pepper Chicken

Hope you guys had a wonderful diwali celebration, mine went as usual with simple festive foods and my mom's sweets and savouries. An another usual day for us, by the way i watched all the diwali special programmes and planning to watch out a diwali movie this weekend,again this weekend is going to be our diwali party with friends and relatives.Am happy to share that i won third prize with 1000rs as prize money hosted at Asiya akka's Feast of Sacrifice Event. Thanks Akka,its a diwali gift for me.

Coming to this easy pepper chicken, i prepared this dish for an event which happened in FB for lil gal who have so many allergies towards the foods, she dont eat loads of foods coz of her allergy and her mom dont know how to cook for her with the limited foods she can have easily. Her aunt asked to us to make out some dishes with a list of ingredients she can eat without any problem. I choosed chicken and prepared this quick and very easy pepper chicken for the lil darling. This dish hardly needs less time to cook, you dont even need to chop onions. With a bowl of rice,this simple pepper chicken tastes awesome.Sending to 60days of Christmas hosted by Priya and Divya.


1cup Chicken pieces (boneless)
1no Green bellpepper (sliced)
1no Bayleaf
1inch Cinnamon stick
2nos Cloves
1tsp Ginger garlic paste
1/2tsp Pepper powder
Salt
Olive oil

Heat the olive oil, fry the bayleaf, cinnamon stick and cloves, add immediately the ginger garlic paste until the raw smell goes off.

Add immediately the chicken pieces, sliced bellpeppers and saute for few minutes, finally add the pepper powder, salt and cook in simmer until the chicken pieces gets well cooked with the spices.

Serve hot..

Tuesday, November 13, 2012

Barley Murukku & Diwali Wishes

                                                    May the divine light of diwali
                                                    spread into your Life
                                                    peace, prosperity, happiness
                                                    and good health.

                           Wishing my readers and my blogger buddies a happy and safe diwali. 

Every year even many miles separate us from India, we still manage ourselves to celebrate this beautiful diwali festival with our friends and relative, but unfortunately this time its a working day and so its quite dull here. Wish very soon Diwali will be considered as a important festival and i want the french government to declare its a government holiday, i know it will happens only in my dream.Also am very happy to say that this post is my 2,250th post,thanks to each and every readers for making this, nothing is possible without all your encouraging words.

Coming to this barley murukku, this time i just prepared this murukku along with garlic moongdal murukku, check out my guest post at Swasthi's Blog. I never thought that barley flour will works wonder for making these crispy beauties,since its my first time to make savouries with homemade barley flour, i wasnt that much sure about the final result. But for my surprise, they turned out simply mindblowing.For making barley flour yourself at home, just roast a cup of pearl barley, grind it once its get cool with a mixer and sieve it to get the barley rava and barley flour, conserve them in air tight box for further use. No need to search in your Indian stores for barley flour, i'll advice to make yourselves this kind of flours at home itself with minimum efforts.Sending to my own event CWS-Barley guest hosted by Roshni.


2cups Rice flour
1cup Barley flour
1/2cup Roasted gram flour/Pottukadala maavu
1tbsp Butter(room temperature)
1tbsp Cumin seeds
1/4tsp Asafoetida powder
1/4tsp Ajwain seeds (crushed)
Oil for deep frying
Salt

Take the rice flour,barley flour,roasted gram flour,butter,cumin seeds,asafoetida powder,salt and ajwain seeds in a large bowl.

Gradually add the water and knead everything as a soft and stiff dough.

Heat the oil for deepfrying in a kadai.

Take a murukku press with star nozzle,pinch a small portion of the dough,drop it into the press and squeeze out as round shaped murukku in a greased flat plate.

Once the oil is hot, add the squeezed murukku.

Fry on both sides until its golden brown drain the excess of oil with paper towel.

Repeat the same process until the dough gets finished.

Fry the murukkus in small batches.

Arrange in an air tight containers and enjoy.

Monday, November 12, 2012

Khara Boondhi/Spicy Boondhi

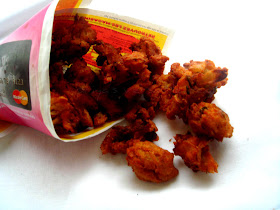
Khara boondhi, after crunchy munchy murukkus these tiny pearls with gtam flour is one of my most favourite. When i was kid, my mom used to make specially for me some spicy boondhis while she was preparing laddoos. I love it that much, but i didnt prepared them since a long as i dont have the special ladle for making these boondhis, finally i prepared some two days back with a stainless steel strainer i bought during my last trip to India.They came out extremely crispy and with some cashew nuts and peanuts fried along with few curry leaves turned this crispy boondhi more tasty and flavourful.

Boondhis are quite easier when compared to other Indian savouries, but the consistency of the batter is very important to get them prefectly. My next trip to India already have a long list and definitely i wont come back here without the boondhi ladle. This is my third post for this week's blogging marathon under the theme 'Diwali special', hope you guys enjoyed my three day's diwali special dishes, do check out the marathoners running this 22nd edition of blogging marathon here.


1cup Gram flour/Besan
1/4cup Rice flour
1tsp Chilly powder
Few curry leaves
1/4cup Raw peanuts
20nos Cashew nuts
3nos Garlic cloves(crushed)
pinch Baking soda
Salt
Oil for deep frying

Mix the gram flour,rice flour,salt,baking soda and chilly powder together in a vessel with enough water to make a thick batter without any lumps (the batter should be like the idli batter).

Heat the oil for deep frying, once the oil gets hot add the cashew nuts and fry until they turns brown, remove it and add the peanuts to the oil and fry until they turns brown.

To the same oil, fry the crushed garlic cloves and curry leaves together until they turns crisp and remove it from the oil, take all these fried ingredients in a large vessel.

Now with the boondhi ladle or a ladle with small round holes, rub the batter with an another ladle so that the batter will fall through the holes evenly.

Fry until it turns crispy, remove it with a slotted spoon,drain the excess of oil with a paper towel and finish the remaining batter with the same process.

Now add the chilly powder to the boondhis, fried cashews,fried garlic,fried peanuts and curry leaves, toss it gently and store in air tight box.

Enjoy with a cup of coffee.

Sunday, November 11, 2012

Makhana Cornmeal Laddoos

For my second day of blogging marathon with diwali special as theme, i decided to make some laddoos with lotus seeds aka makhana. I grabbed a packet of this lotus seeds during my last trip to India, back home i stored them in air tight box and making out dishes with them very rarely,coz these lotus seeds are like treasure for me. We dont get this wonderful seeds here, so obviously i take more care while using these seeds as i dont want to waste them.

For diwali, i quickly prepared this delicious makhana laddoos with yellow cornmeal, this laddoos is definitely one of the easy breezy,quick and healthy balls.These laddoos stays prefect for a week in room temperature and instead of ghee i used milk for rolling this laddoos. Give a try friends, if you get lotus seeds easily this laddoos will definitely satisy your sweet tooth.Check out the marathoners running this 22nd edition of blogging marathon here.Sending to 60days of Christmas hosted by Priya and Divya.


1cup Cornmeal
20nos Lotus seeds/Makhana
1cup Sugar
1/2tsp Cardamom powder
2tbsp Ghee
Milk as per need
Few broken cashew nuts

Heat  a tablespoon of ghee and fry the broken cashews until they turns brown.

Take off the fried cashews and roast the cornmeal in the same pan for few minutes.

Transfer the cornmeal to a plate, heat the remaining ghee,fry the lotus seeds until they turns bit crisp.

Now take the roasted cornmeal,roasted lotus seeds,sugar in a mixer and grind everything as bit coarse powder.

Take the coarse powder,fried cashews in a plate,springle enough milk and make out small balls from the mixture.

You can also use ghee while making this laddoos.Store in air tight containers.

Saturday, November 10, 2012

Eggless Achu Murukku/Rose Cookies/Achappam

We are starting our second week of blogging marathon this week,my theme for this week is Diwali special, since diwali is next tuesday, everyone will be very much busy with shopping and diwali sweets and savouries making.Coming to my today's achu murukku aka achappam is a quite popular crispy sweet of Tamil Nadu and Kerala, they are well known as achu muruku in Tamilnadu,while Keralites call it as achappam.Its a sweet deep fried beauties,prepared with usually with maida,riceflour and eggs with sugar. These beauties will have their own unique taste with less sweet. Anyone will love this crispies, i prepared my achu murukkus without eggs and they came out extremely prefect.

Everyone at home enjoyed these deep fried cookies when i asked them to taste it, also am trying for the first time this fabulous achu murukkus for diwali. Last time when i went to India, i bought this murukku's mould which is quite important to make this murukku.Back home,i tried this achu murukku before few months, but my first trial was disaster, then i mailed my blogger marathoners to ask how they prepare their mould before making these cookies. They seriously shared wonderful tips and i followed exactly, finally i was able to get my one of my favourite murukkus without any fail.


1cup Raw rice
1/4cup Maida
1/2cup Sugar
1/4cup Grated coconut
1cup Coconut milk/water
pinch Salt

Soak the rice for 3 hours, grind the soaked rice with grated coconut,coconut milk as super fine paste.

Transfer this rice batter to a bowl,add the maida, sugar and turn everything as thick batter, the batter should be like dosa batter consistency.

It shouldnt be neither liquid nor thick.Adjust the consistency of the batter either by adding the maida or coconut milk if needed.

Heat oil in a kadai, once the oil is hot, put the achu murukku mould to the hot oil for a minutes.

Take immediately the mould and dip into the batter, the mould should be covered with the batter to 3/4th of the mould.

Since the mould is hot,the batter will stick immediately to it and drop gently the batter sticked mould to the hot oil.

With a fork, once the batter is half cooked  remove the murukku from the mould and cook completely until they get a nice brown colour.

Drain the excess of oil with a paper towel.

Repeat the same process for the remaining batter.

Dont forget to sit the mould before dipping the mould to the prepared batter, else your batter wont gets sticks.


Friday, November 9, 2012

Barley Namak Pare

Namak pare is a famous Indian snack prepared during the festivals, i prepared my savoury bites with homemade barley flour,wheat flour,all purpose flour with ajwain seeds as spicy version. Namak pare, these savoury bites are quite popular in North India eventhough we south Indians prepare them both savoury and sweet version.These savoury bites gets ready in jiffy and they were absolutely addictive, my version of namak pare turned out extremely crispy and we couldnt stop munching.

An excellent evening snack, barley flour in this namak pare didnt changed the texture or taste of this crisps.Honestly until you wont say that these savoury bites are prepared with barley and whole wheat flour,none will notice it.You can cut them as diamond cut or as squares but i simply went for rectangular shaped biscuits as my lil one wanted as though. Make this quick savoury bites anytime and they will stay prefect more than a week if they are conserved in air tight containers.Sending to my own event CWS-Barley guest hosted by Roshni.

1/2cup Wheat flour
1cup Barley flour
1+1/4cups All purpose flour
1tbsp Ajwain seeds
1/8tsp Baking soda
1tsp Red chilly powder
Oil for frying
Salt

Take together the wheat flour,barley flour,all purpose flour with ajwain seeds,baking soda and red chilly powder in a bowl.

Slowly add water to make a stiff dough.

Cover and keep aside for half an hour.

Make 3 large balls from the dough and roll out as a large round disc.Meanwhile heat the oil for deepfrying.

With a knife,cut them as thin strips and then as rectangule strips.

Drop them in hot oil and fry until they turns brown and crispy.

Drain the excess of oil with a paper towel and store them in air tight containers.

Munch with a cup of coffee.

Thursday, November 8, 2012

Adhirasam

Adhirasam,the word itself makes me drool, its was one of my most favourite diwali special sweet. My grandma prepare this wonderful delicious rice based sweets specially for me whenever i ask her to make some. She was the only person for me who makes prefect adhirasam since i was kid, she makes a huge vessel full of this adhirasam for every diwali to distribute them  the whole village as the entire village is our relatives, obviously this dish makes me nostalgic.

After many flops, this time i was bit confident to give a try to my favourite adhirasam,i will definitely blame my blogger buddies for pulling me to give a try to this authentic sweet. They turned out extremely fabulous as like my grandma's adhirasam and got almost 13 medium sized adhirasam. I was seriously happy, when my first adhirasam came out prefectly.Sending to 60days of Christmas hosted by Priya and Divya.


2cups Raw rice
1cup Grated jaggery
1/2tsp Cardamom powder
Oil
1tbsp Ghee
Milk (as per need)

Wash and soak rice for two hours, drain the water and spread the rice on a clean cloth and let it dry for 15minutes.

Rice should be still wet, grind the rice in a mixer as super fine sooji like consistency.

Sieve the rice flour or else remove the lumps if there is any.

Rice flour shouldnt be dry,if you hold them with your fingers,you should able to get balls. Cover it and keep aside.

Cover the jaggery with a half cup of water, bring to boil. Strain this jaggery syrup to remove the impurities.

Bring again boil in a thick bottomed vessel and add the cardamom powder and cook until it bubbles.

Keep a small bowl of water, add few drops of this syrup, if the drops gets settled in the vessel and you are able to make a ball,that is the correct consistency for adhirasam,put off the flame.

Add immediately the already prepared rice flour little by little to the syrup with ghee and mix well to form a dough.

Always prepare this dough before a day, keep it in room temperture for a whole day.

Check the dough after a day,if its hard to form balls, springle milk and turn them as soft dough.

Next day, heat enough oil for frying, apply oil on a plastic sheet, make a lemon sized ball from the dough,flatten them as round shaped disc and slowly drop them in hot oil.

Cook on both sides until they gets a nice brown colour, remove the cooked adhirasam from the oil.

Press it gently with two slotted ladle to remove the excess of oil and arrange them in a paper towl.

Spread them to cool completely and store them in air tight containers.

Wednesday, November 7, 2012

Besan Badam Burfi

Diwali is just around the corner, am very tempted to see all the beautiful savouries and sweets made by my other blogger buddies sharing since a week in this virtual world. Since this diwali is going to be a working day for us,we wont have much fun this time and i 'll be doing my pooja either before everyone goes or else late in the evening, yep its going to be a usual week day for us. I really miss this festival here, wish i live in India during this wonderful festival of lights.Its going to be almost 18years i didnt celebrated in India,every year i'll console myself that may be next year i'll be in India during this festival, but unfortunately it never happened to me.

Yesterday i quickly give a trial to this delicious burfi prepared with roasted gram flour and almonds, the outcome was a fantabulous,super soft burfi, we couldnt stop ourselves having them. If you are bored of usual sweets give a try to this irresistible burfis,am damn sure you guys will love it.Sending to 60days of Christmas hosted by Priya and Divya.


1cup Gram flour
1cup Almonds (blanched)
1cup Milk
2cups Sugar
1/4cup Oil
1/2cup Ghee
pinch Salt

Dry roast the gram flour until the aroma comes out.

Mix the oil to the gram flour and keep aside.This will avoid the lumps while adding the gram flour.

Grind the blanched almonds with milk and make a paste.

Meanwhile make a sugar syrup with sugar and a half cup of water, sugar syrup must be in one string constitency.

Add gradually the thick almond paste, gram flour to the sugar syrup and the ghee to the sugar syrup,stir the mixture until they turns as a dough (at this time this dough will get off from the vessel).

Pour this dough over a greased plate, let them cool and cut them as any shape as u desire..

Delicious burfi is ready.

Tuesday, November 6, 2012

Soyachunks & Barley Pinched Fritters

There were some leftover cooked soyachunks after preparing these low fat soya aloo kofta,i simply went making this pinched fritters aka killu pakodas with homemade barley flour with usual spices along with those leftover soyachunks.For making barley flour yourself at home,just simply dry roaste pearl barley and grind as fine powder, finally sieve it to get the barley rava and barley flour.I'll be posting soon a upma with barley rava and an another interesting savoury snack with barley flour as am gonna make as diwali special.

Coming to this pinched fritters, i mixed gram flour,rice flour and barley flour together for making these crispy beauties. Grounded soyachunks with onions turned this fritters simply awesome,addictive and flavourful. If you make these fritters at home,am damn sure you will keep on munching them, yep its quite hard to stop munching this delicious pakodas.Sending this fritters to my own event CWS-Barley guest hosted by wonderful Roshni.


1cup Soyachunks (cooked & grounded as coarse paste)
1no Onion (big & chopped finely)
1/4cup Barley flour
1/4cup Gram flour
1tsp Ginger(grated)
1/2cup Rice flour
2nos Green chillies (chopped)
1/2tsp Fennel seeds
Chopped coriander leaves
Curry leaves
Salt
Oil for deep frying

Take the coarsely grounded soyachunks,chopped onions, barley flour, gram flour, rice flour,grated ginger, chopped green chillies, fennel seeds,curry leaves and chopped coriander leaves with enough salt.

Mix everything well,springle some water and turn everything as a thick dough.

Heat oil for deep frying.

Take a golf balled size batter and pinch gently a small quantity of this dough and drop gently to the hot oil, fry until they turns crispy and golden brown..

Enjoy hot with a cup of coffee..

Monday, November 5, 2012

Barley Masoordal Soup

Barley is a wonderful cereal which is not usually used in everyday cooking. These wonderful grains is a great source of protein,iron and fibre and i started cooking with it since i heard lot about their nutritional value. Obviously i never forget to pick them whenever i go to a chinese store where this wonderful grain is cheaper when compared to our Indian stores.

The weather is getting super dull here and yesterday i prepared quickly this wonderful,healthy,nutritious and super comforting soup by combining both masoordal and barley. I quickly prepared this soup through pressure cooking and this soup takes hardly less than 20minutes to get ready. Masoor dal with barley makes this soup a complete food, you can also add any vegetables to this soup to make it more healthier,however i went for just dal and barley. Sending this nourishing soup to my own event CWS-Barley guest hosted by wonderful Roshni.


1/2cup Barley (soaked for an hour)
1/4cup Split masoor dal
1no Onion (chopped)
2nos Garlic cloves (chopped)
Salt
Olive oil
1/2tsp Pepper powder
1/2tsp Dry thymn leaves

Heat enough olive oil in pressure cooker, add the garlic cloves and chopped onions and saute everything for few minutes until the onions turns transculent.

Now add the soaked barley,washed masoordal,salt,pepper powder,dry thymn leaves and saute for few seconds, add 5cups of water and pressure cook for 3whistles.

Once the steam get released, serve hot with few toasted bread slices.

Low Fat Soya Aloo Kofta

For my third day of blogging marathon, am posting here a low fat version of kofta, prepared with soyachunks and potatoes.Usually koftas are fried either by deepfrying or shallowfrying, being a health conscious person i always goes for baked ones. Since a long,i want to give a try to this low fat version after going through some of my blogger's space.Finally i decided to prepare my koftas through appam pan with few drops of oil and am very satisfied with the final result.

Seriously these koftas turned out absolutely prefect with a crispy outer. Everyone at home just loved it simply with ketchup. With less oil,this koftas are definitely healthier than the deep fried ones,if you dont like baking this version will definitely helps you a lot. Please get faster your appam pan, if you get a nonstick appam pan you doesnt even need to add those few drops of oil too.Check out the marathoners running this 22nd edition of blogging marathon here.Sending to Kid's Delight-Healthy Makeover guest hosted by Rasi, event by Srivalli.


1cup Soyachunks (cooked & grounded as small pieces)
2nos Potatoes (cooked & mashed)
1no Onion (chopped finely)
2nos Green chillies (chopped)
1/2cup Roasted gram flour/pottukadala maavu
Salt
1tsp Garam masala powder
Few curryleaves
Oil

Take the grounded soyachunks,mashed potatoes,chopped chillies,chopped onions,roasted gramflour,salt,garam masala powder and curry leaves together in a bowl.

Mix well and make small balls with this mixture.

Heat the appam pan,drop few drops of oil.

Once the oil is hot,drop gently the already prepared balls to the warm oil,put the flame in medium and cook on both sides until the crust turns brown.

Serve hot with ketchup.

Sunday, November 4, 2012

Microwave Eggless Chocolate & Carrot Mug Cake

Mug cakes, these single serving cakes will definitely satisfy your sudden sweet cravings. I do prepare quite often these mug cakes for my kid's evening snack, as these cakes are really very quick to prepare.Yesterday i prepared this fabulous chocolate and carrot mug cake as eggless version for their evening snack. You can make this simple and quick mug cake with anything and your cake gets ready easily anytime of the day whenever you feel like having this cake.

As my theme for this week's blogging marathon is kid's delight-healthy makeover,i used whole wheat flour,olive oil along with finely grated carrots.My kids enjoyed thoroughly this fabulous,super spongy cake.Check out the marathoners running this 22nd edition of blogging marathon here.Sending to Kid's Delight-Healthy Makeover guest hosted by Rasi, event by Srivalli.


4tbsp Wheat flour
4tbsp Sugar
2tbsp Grated carrot
2tbsp Cocao powder
1/2tsp Baking powder
A pinch Baking soda
3tbsp Olive oil
4tbsp Yogurt

Take all the ingredients in a bowl and whisk together  as a smooth batter.

Fill half of the coffee mug with this prepared cake batter.

You can prepare two medium sized mug cake with this batter. Cook in high power for 2 minutes.

Take care not to overbake otherwise your cake will turns rubbery.

Enjoy warm.

Saturday, November 3, 2012

Baked Oats Crusted Paneer Fingers

Paneer, the famous Indian cheese is one of our family favourite cheese sinceever we tasted in an Indian restaurant. My fridge will always have a packet of paneer,in case if i forget to pick the storebought ones, i'll make myself at home.Usually i'll freeze homemade paneer cubes for later use as they are really handy to cook as anything whenever we feel like having something with our favourite Indian cheese.

Coming to the paneer fingers, usually i'll deep fry them and my kids just love it, as i choosed an interesting theme for this first week of blogging marathon i simply baked them with oats as crust, yep i choosed Kid's delight-healthy makeover as theme. Obviously my three days of blogging marathon for this week is going to be kid's friendly dishes with healthy twist in it. If you dont like baking, you can go very well to deep fry or else shallow fry.These fingers tastes absolutely super delicious when served with ketchup. Check out the marathoners running this 22nd edition of blogging marathon here.Sending to my own event Healthy Diet- Healthy Finger Food guest hosted by Preeti of Isingcakes and  to Kid's Delight-Healthy Makeover guest hosted by Rasi, event by Srivalli


300grms Paneer (sliced as fingers)
1tsp Ginger garlic paste
1tsp Red chilly powder
1/2tsp Cumin powder
1tsp Garam masala powder
1tbsp Yogurt
1tbsp Lemon juice
Salt
Oil for baking
Corn flour (as per need for coating)
Rolled oats (as per need for crust)

Take the yogurt,lemon juice,ginger garlic paste,red chilly powder, garam masala,cumin powder and salt in a bowl.

Mix well and dip each paneer fingers in the spice mixture and arrange them in a plate,let them sit for an hour.

Make a neither thick nor thin paste with corn flour and water.

Now dip each paneer fingers to the cornflour paste and roll immediately to the rolled oats.

Preheat the oven to 350F, brush a baking sheet with enough oil lined over a baking tray.

Arrange the oats coated paneer fingers over the greased baking sheet and bake for 15-20minutes (dont forget to turn the paneer fingers twice while baking) until the crust turns golden brown.

Serve warm with ketchup or sweet chilly sauce.

Friday, November 2, 2012

Pan Roasted Spicy Baby Potatoes

Anything roasted in pan is one of my lil one's favourite, if its roasted baby potatoes he is the happiest person in the world. Two days back, since i had some leftover cooked baby potatoes after making poori masala,i quicked prepared this super delicious,spicy pan roasted yummy baby potatoes for his snacks as he love potatoes in any form anytime of the day.

This quick pan roasted baby potatoes doesnt go for neither onions nor garlic, just chilly powder,salt,cumin powder and roasted gram flour is enough to make this yummy dish. If you have cooked potatoes, this dish takes hardly less than 15minutes and obviously this pan roasted cuties will vanish very quickly too.This dish is going to this month's Magic Mingle#11 as the magic ingredients for this month's is potatoes and cumin seeds.Even you can serve this delicious potatoes as starter, a fantastic crowd pleaser.Sending to my own event Healthy Diet- Healthy Finger Food guest hosted by Preeti of Isingcakes.


20nos Baby potatoes (cooked)
1tsp Red chilly powder
1/2tsp Cumin powder
2tbsp Roasted gram flour/pottukadalai maavu
Few curry leaves
Salt
Oil

Heat oil,fry the curry leaves,meanwhile prick the cooked baby potatoes with a fork.

Add now the pricked potatoes to the hot oil, fry for few seconds, add immediately the red chilly powder,cumin powder and salt.

Cook everything for few minutes in simmer until the potatoes gets well coated with the spice powder.

Finally add the roasted gram flour, toss gently everything until the potatoes gets well coated with the flour.

Put off the stove and enjoy warm.